KLEPPSTAD Wardrobe with sliding doors
Before you begin
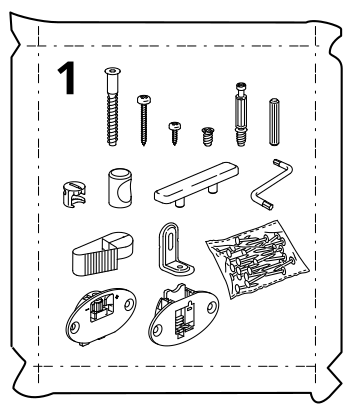
Parts-bag reference showing assorted assembly hardware and components for step 1.
Step 1
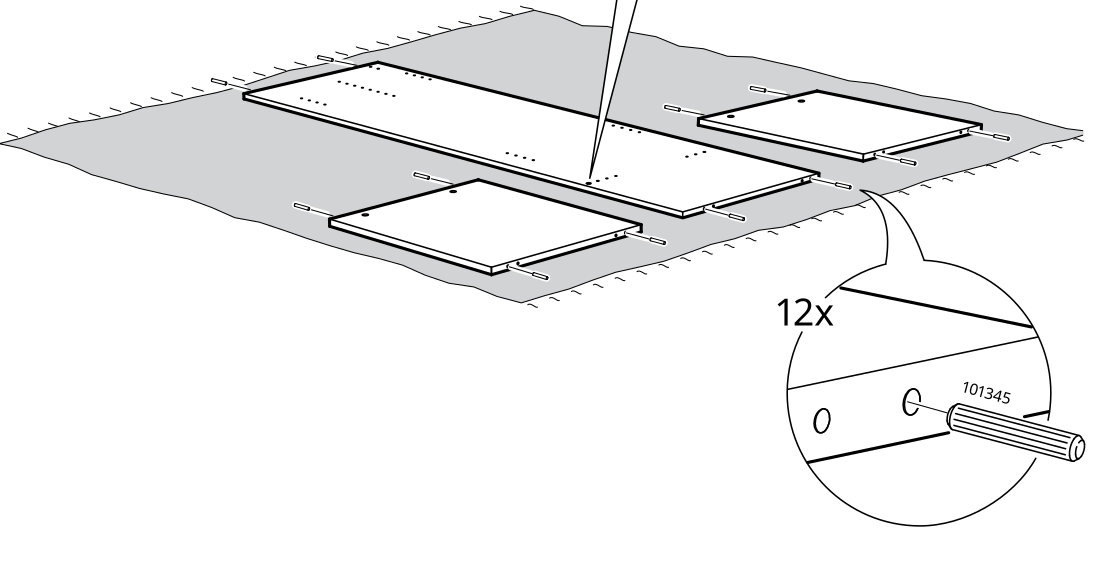
Lay the panels face down, align the pre-drilled holes, and install the cylindrical hardware pieces as shown.
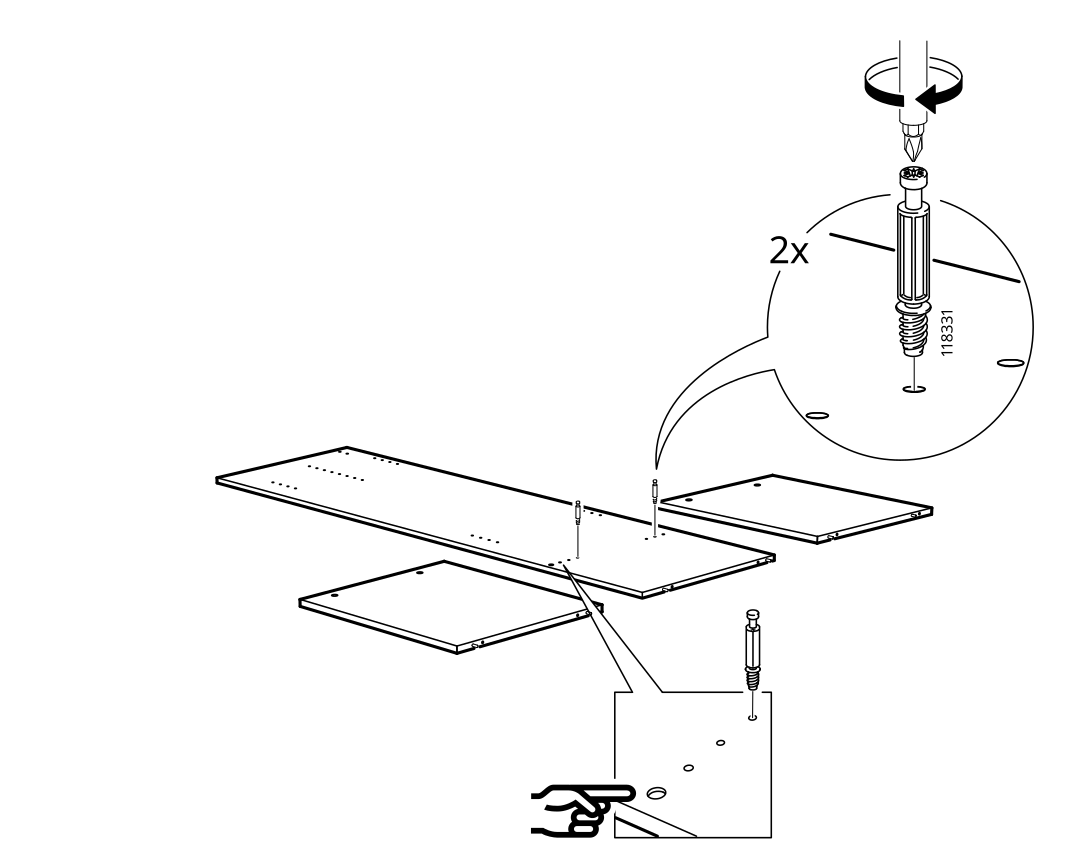
Step 2
Install two 118331 fittings into the predrilled panels and tighten them with a screwdriver as shown.
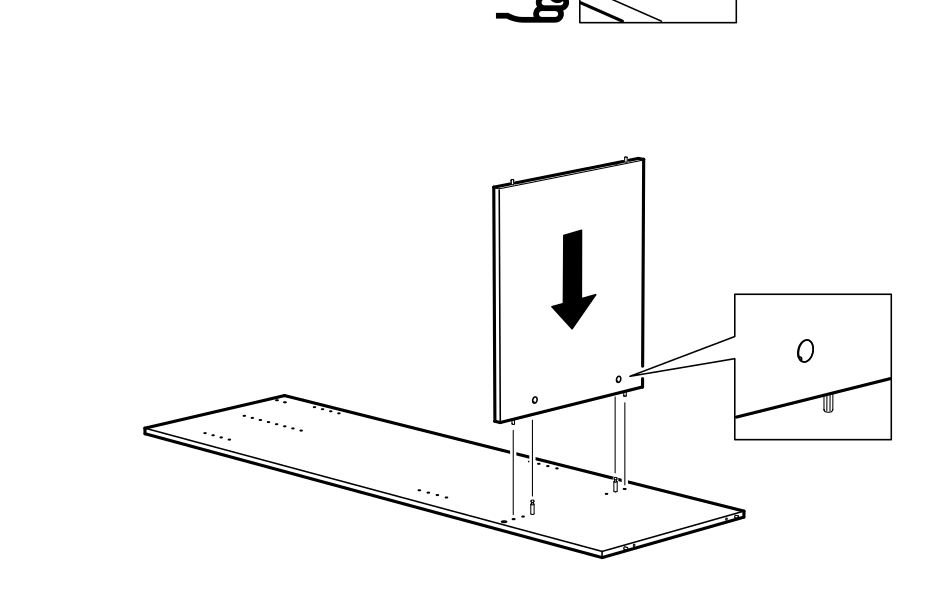
Step 3
Lower the upright panel onto the base panel and align the fittings with the predrilled holes as indicated.
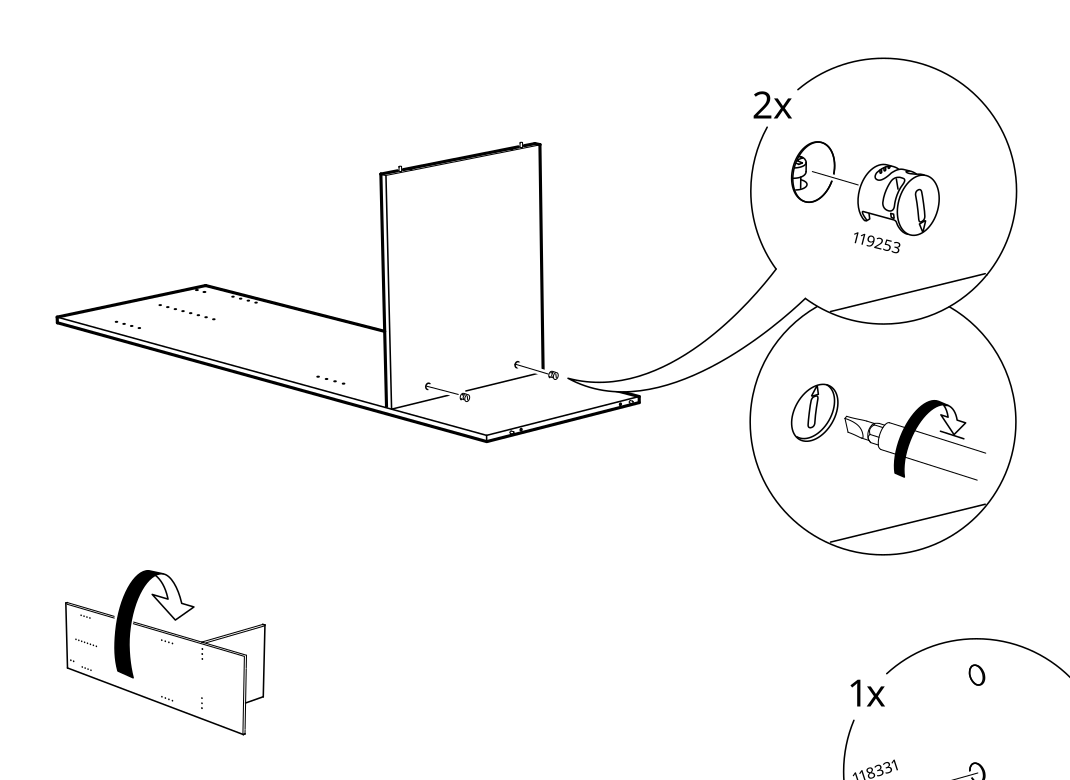
Step 4
Attach the upright panel to the base, secure it with two 119253 fittings, turn the fittings with a screwdriver, and rotate the assembled section as shown.
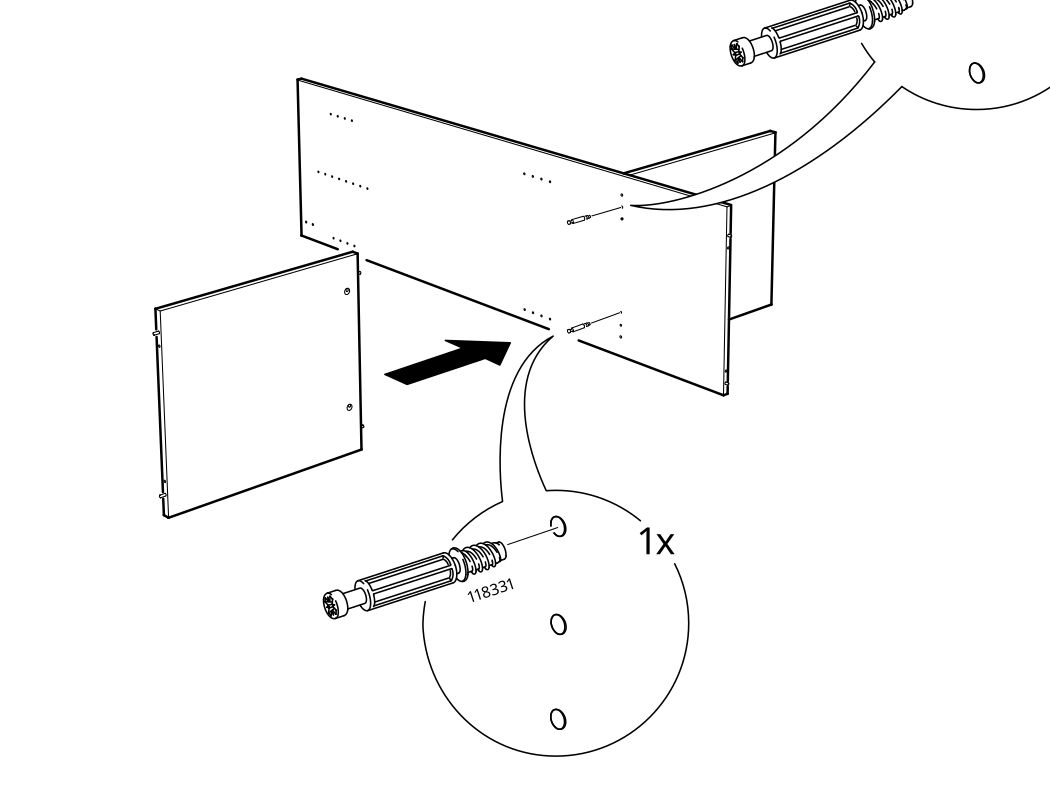
Step 5
Insert the side panel into the cabinet assembly in the direction of the arrow and secure it with the 118331 fitting.
Step 6
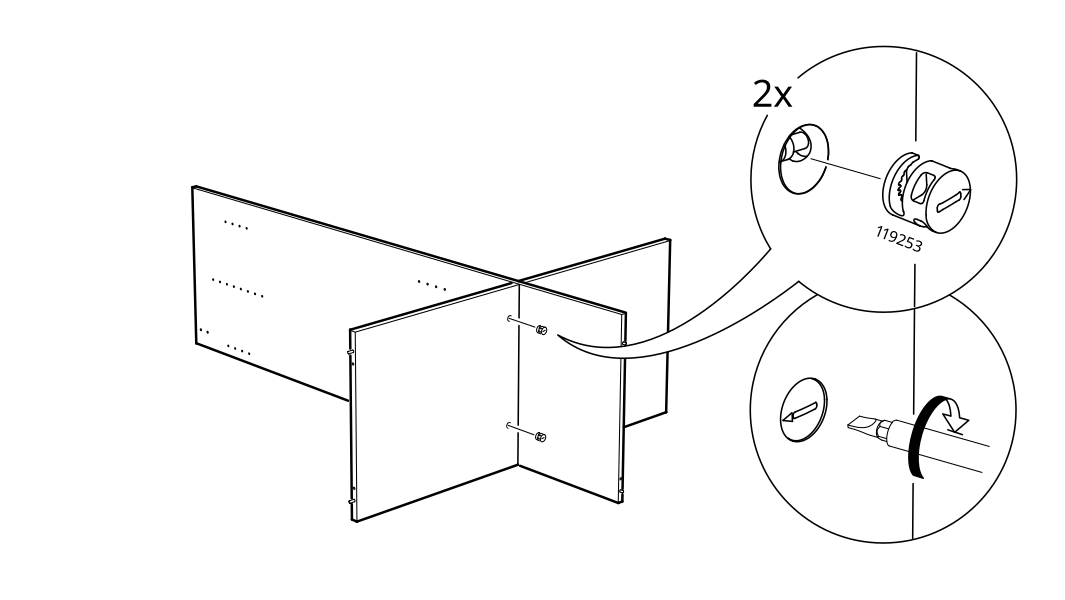
Join the panels using two 119253 cam-lock fittings and turn the locks with a screwdriver.
Step 7
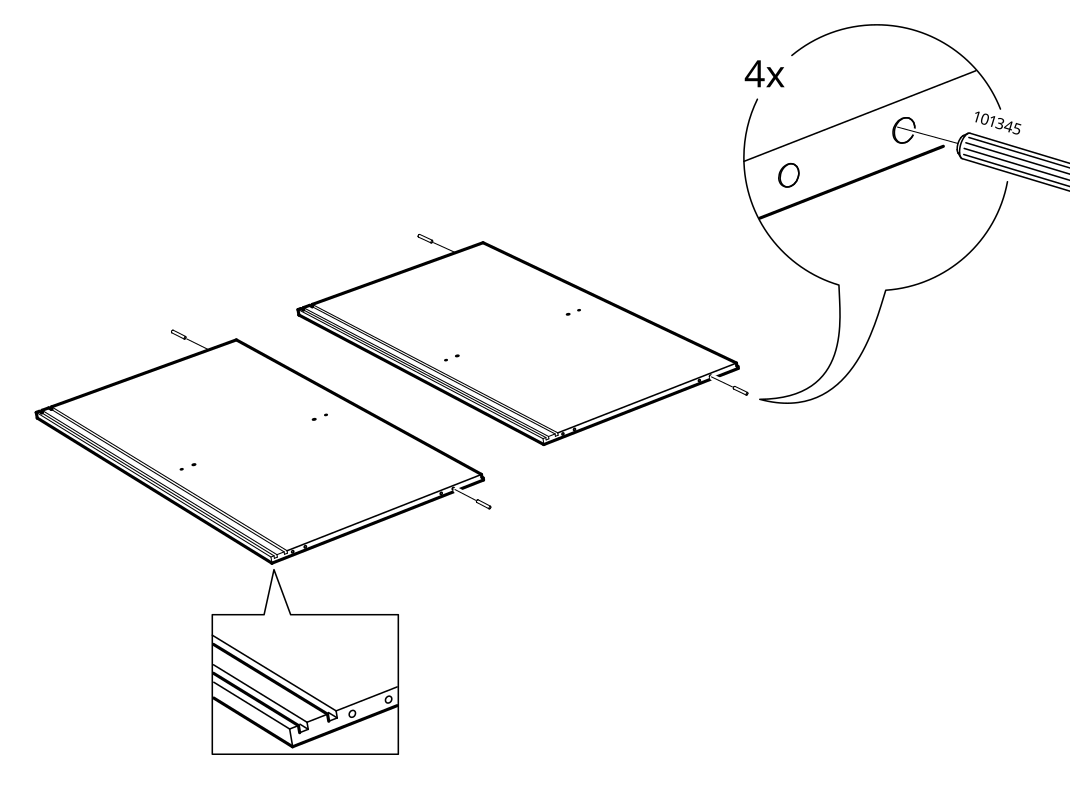
Insert four 101345 dowel pins into the edges of the two panels.
Step 8
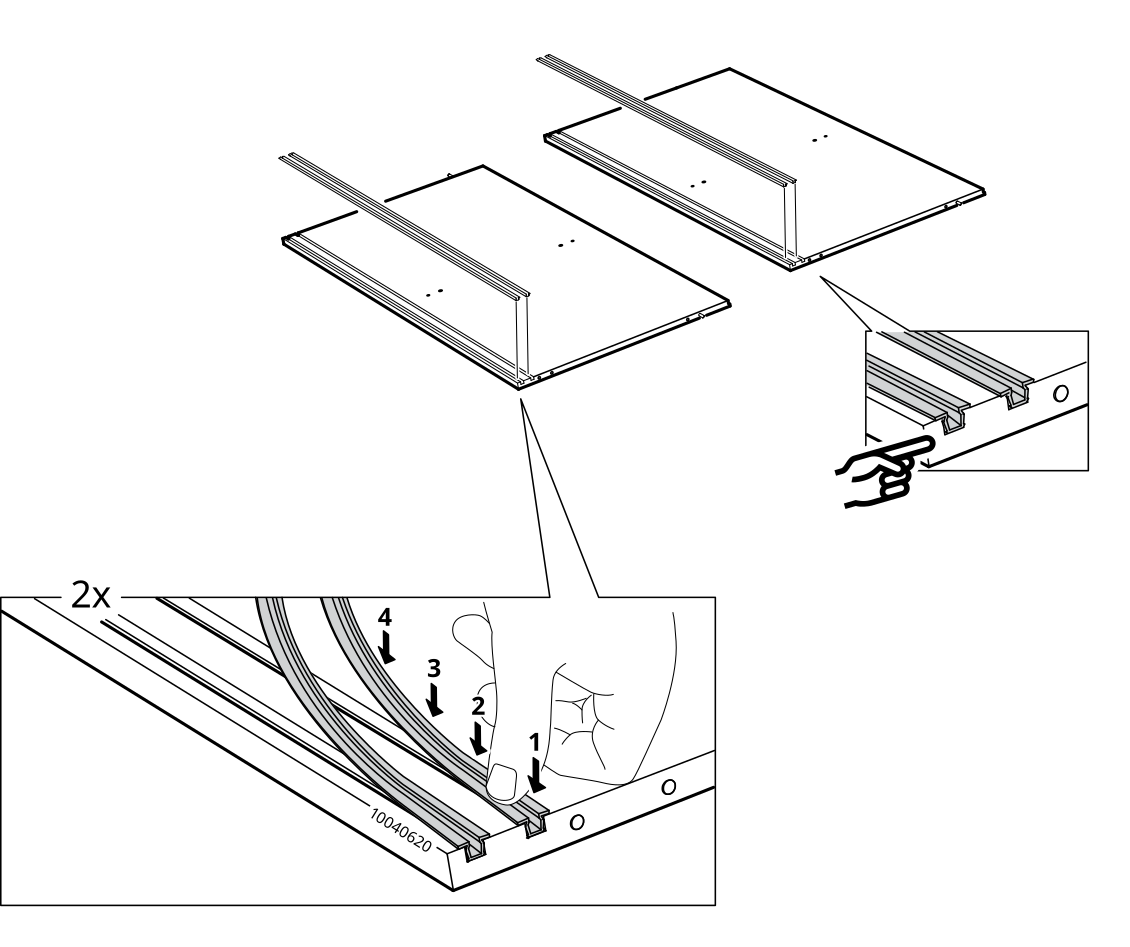
The installer presses two drawer rails into the corresponding channels in the two drawer assemblies, following the indicated sequence.
Step 9
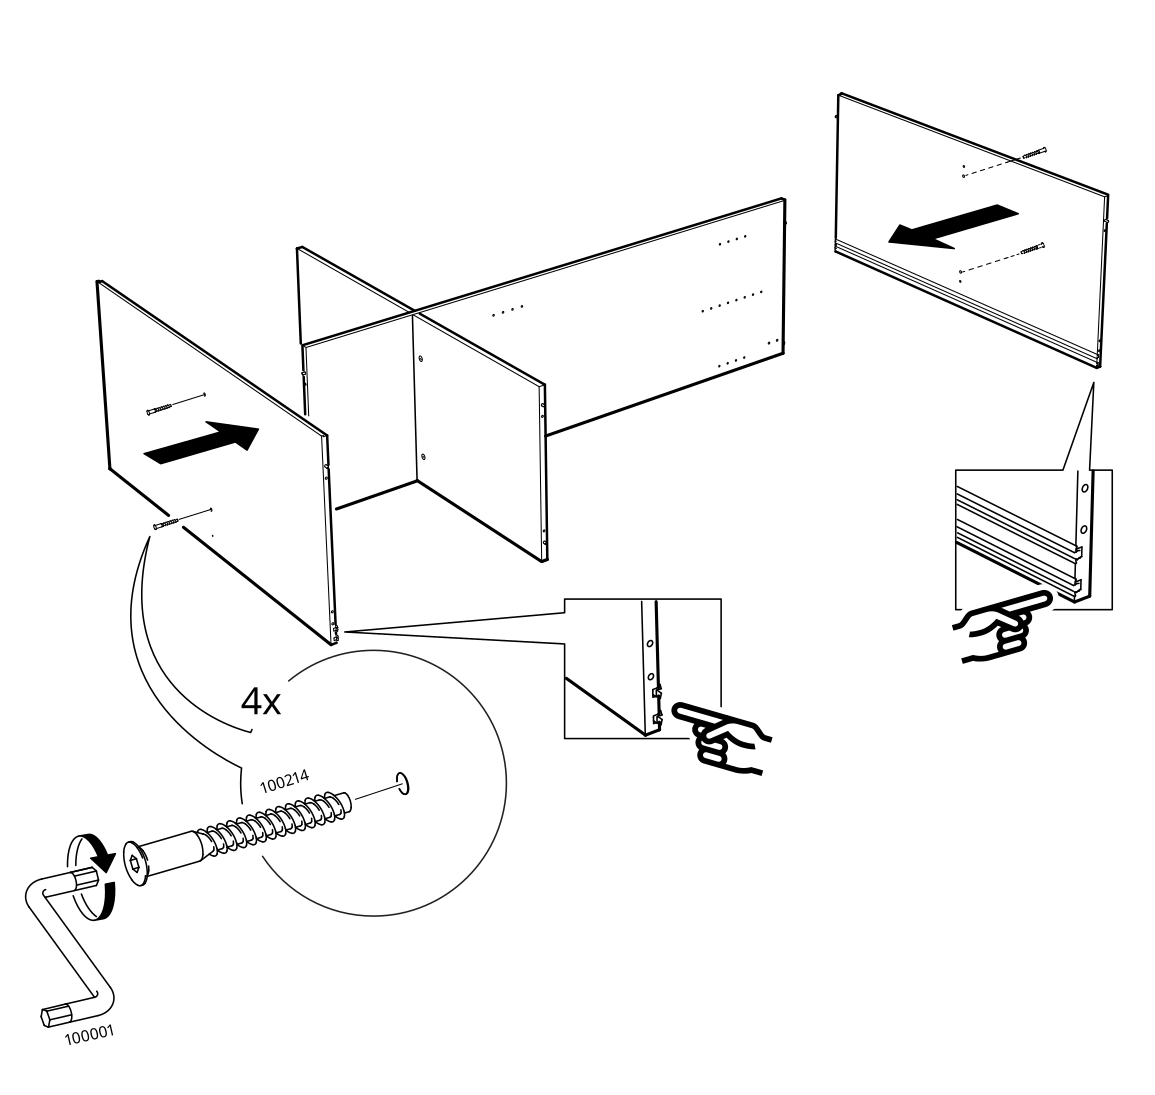
The panels are joined with four screws, which are tightened with the 100001 hex key.
Step 10
Slide the front panel into position against the assembled frame, aligning the panel edge as shown.
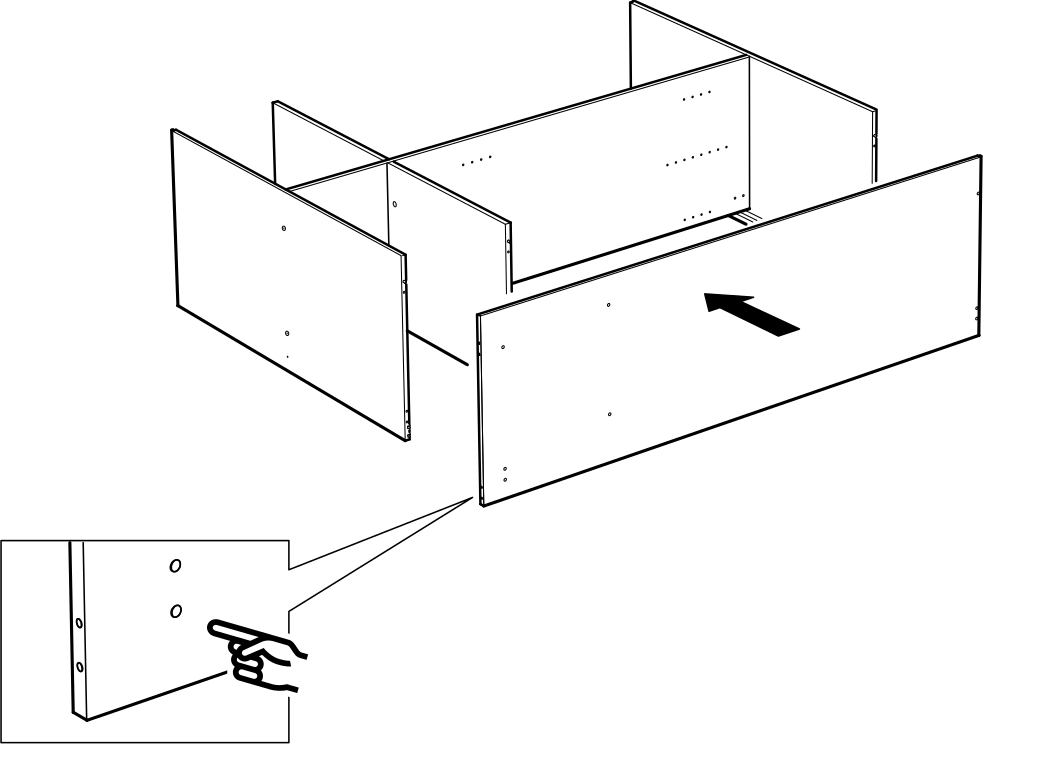
Step 11
Fasten the front panel to the frame with five screws using the 100001 Allen key.
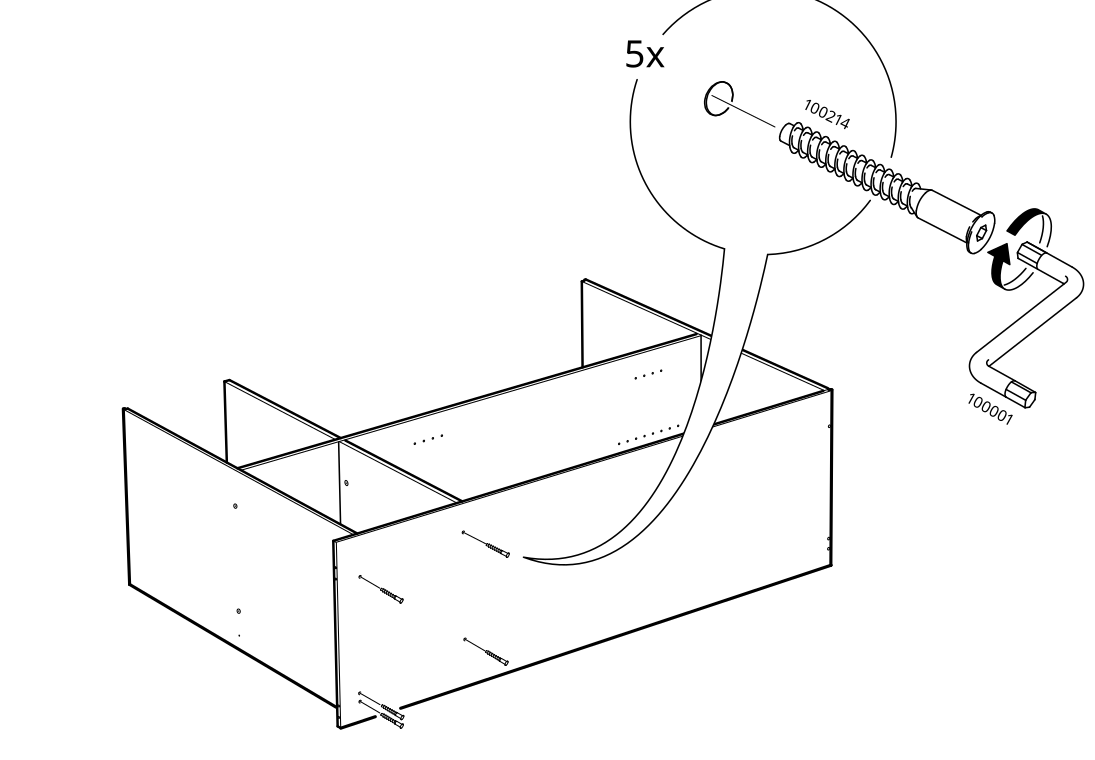
Step 12
Insert four 101345 dowels into the indicated panel or rail components.
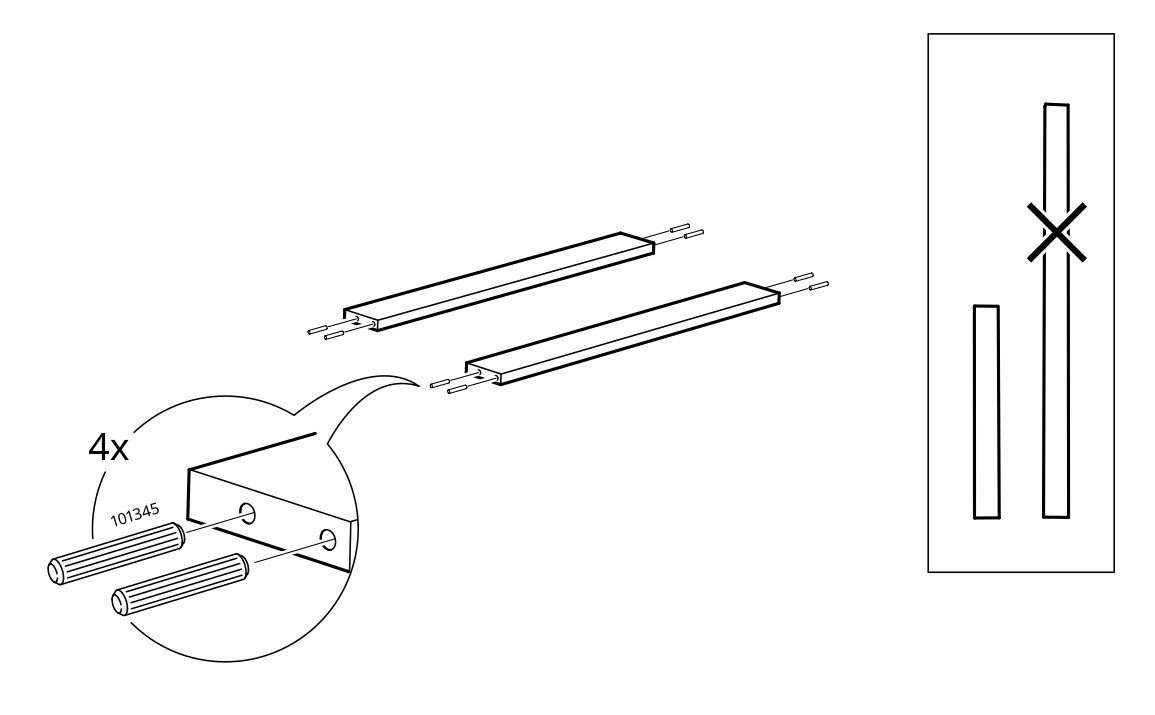
Step 13
Insert and position one unidentified panel or component into the assembled cabinet structure as shown.
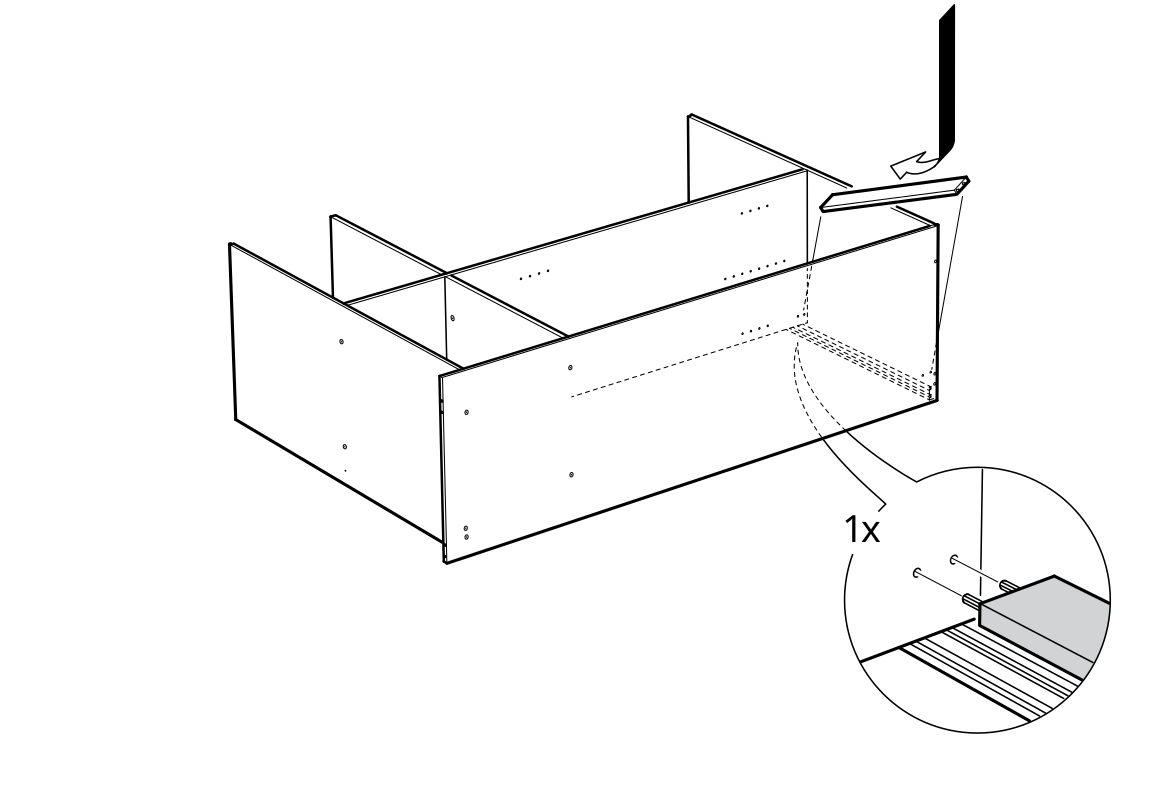
Step 14
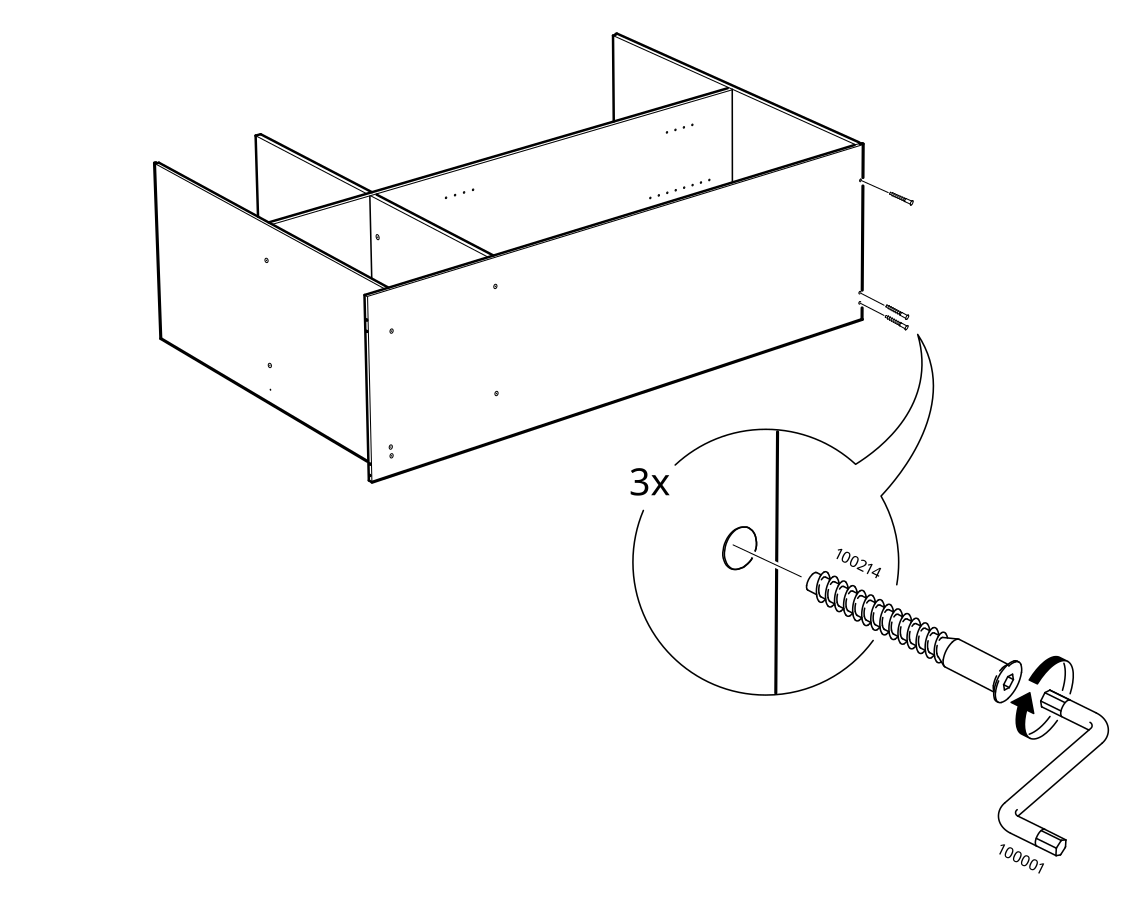
Secure the cabinet panels by tightening three screws with the supplied Allen key.
Step 15
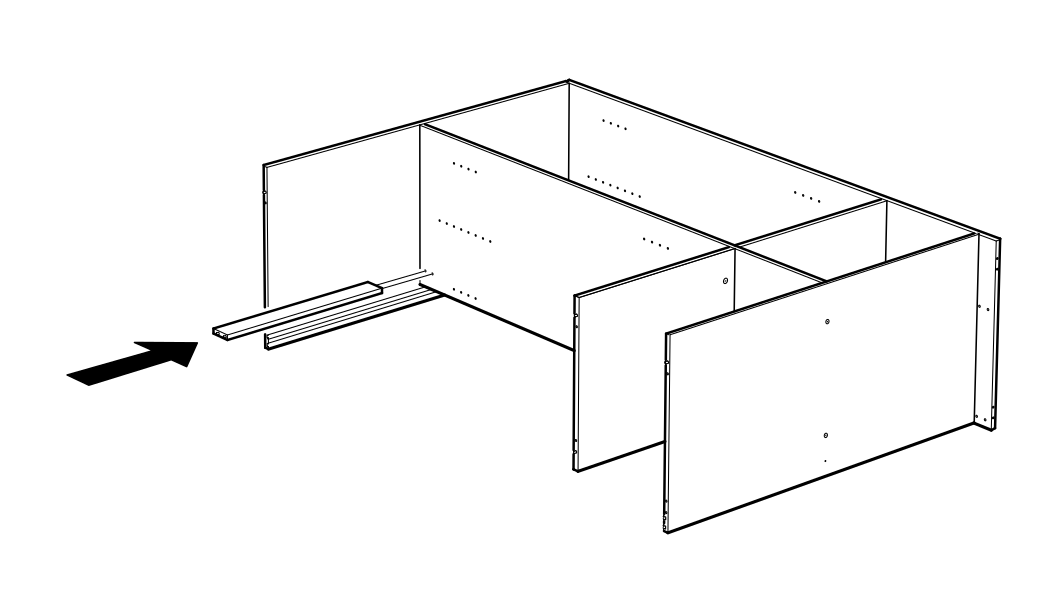
Slide the two drawer runners into the assembled cabinet from the left side.
Step 16
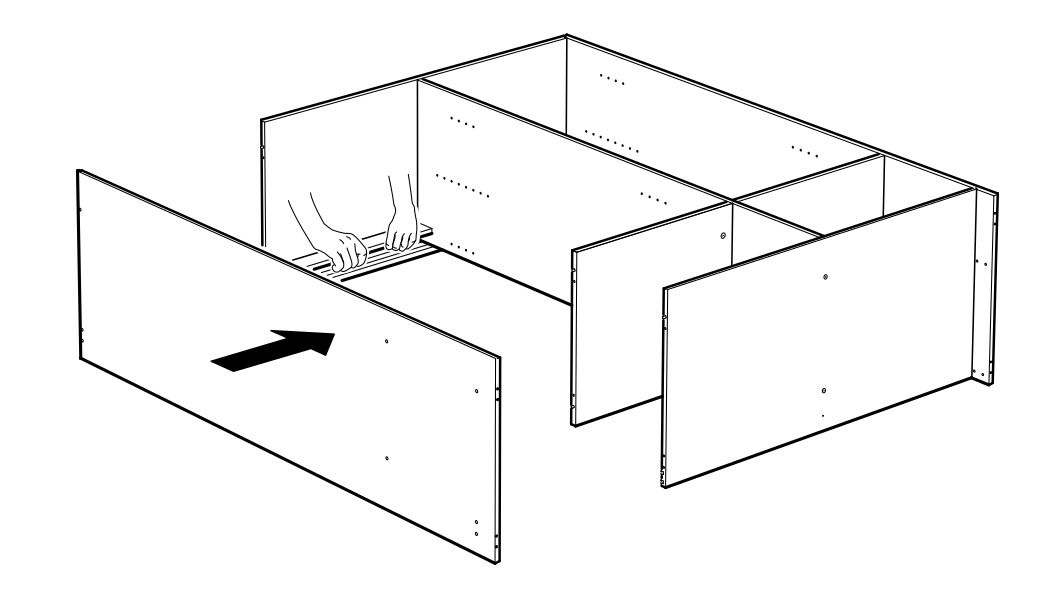
Slide the large front panel into the partially assembled cabinet frame in the direction of the arrow.
Step 17
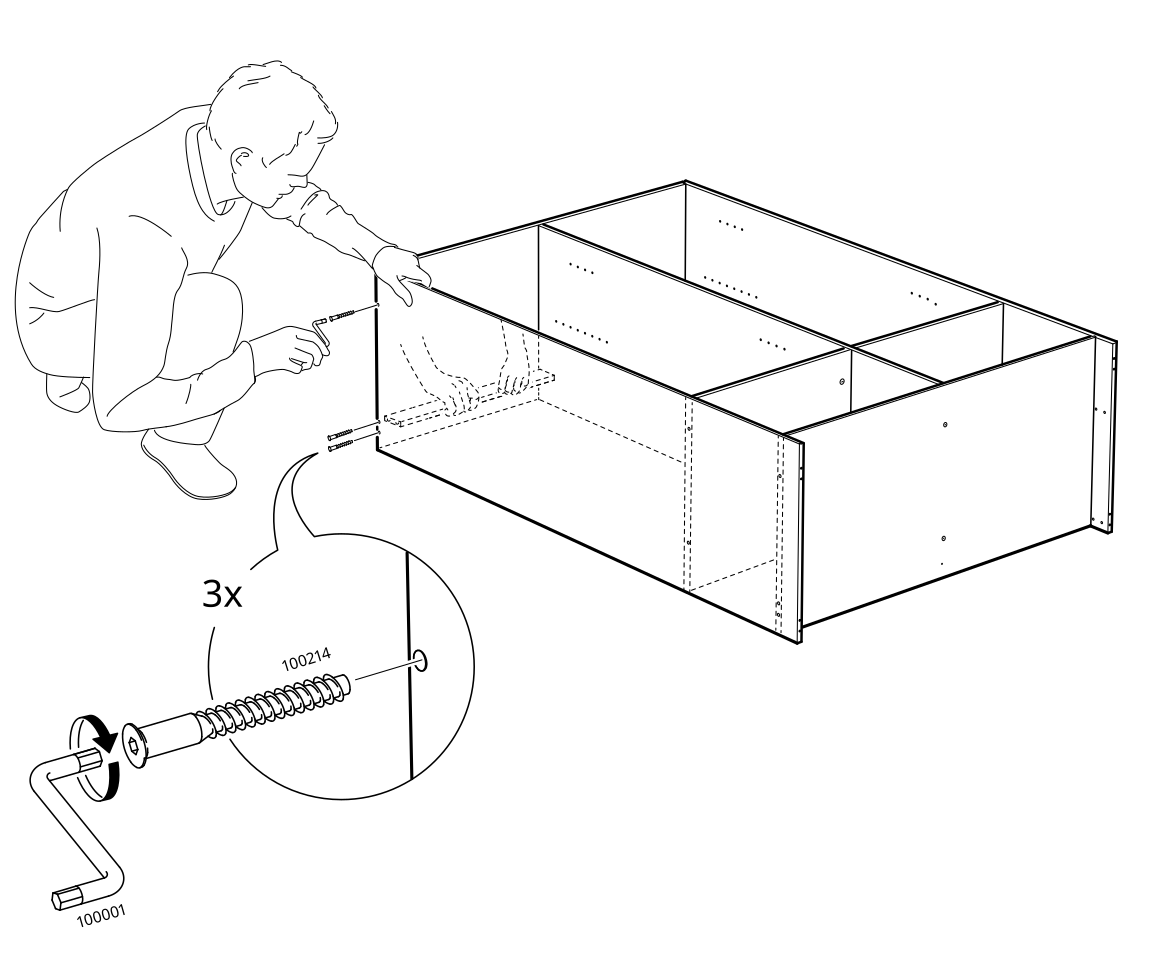
Secure the panel to the cabinet assembly with three screws using the hex key.
Step 18
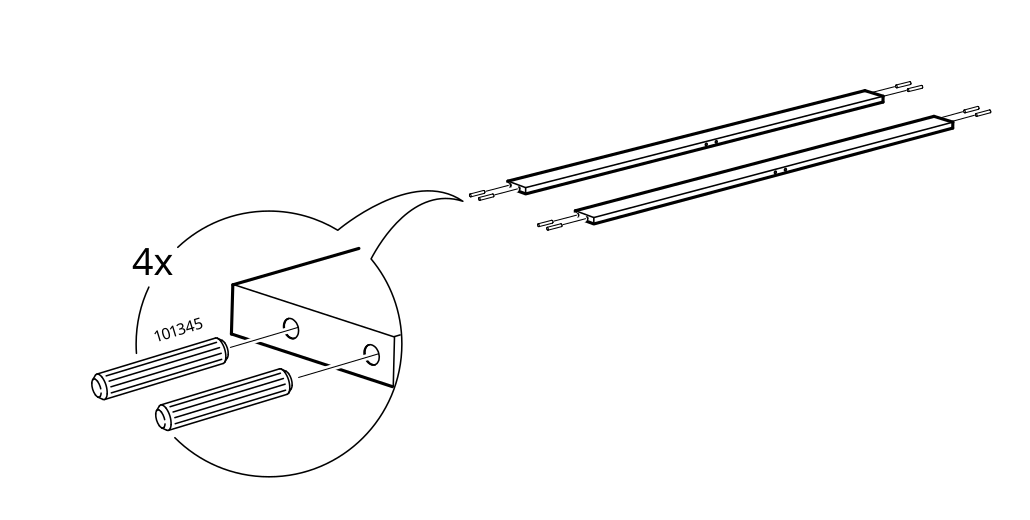
Insert four cylindrical dowels marked 101345 into the holes in the panel, then position the two drawer runners above the assembly.
Step 19
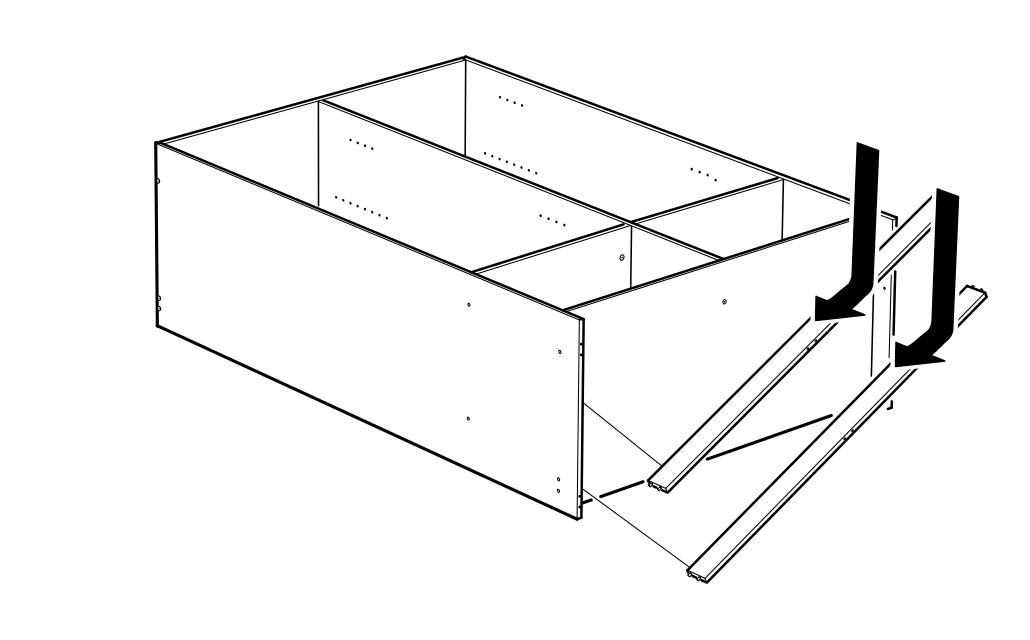
Attach the two long runners to the right side of the partially assembled cabinet as indicated by the downward arrows.
Step 20
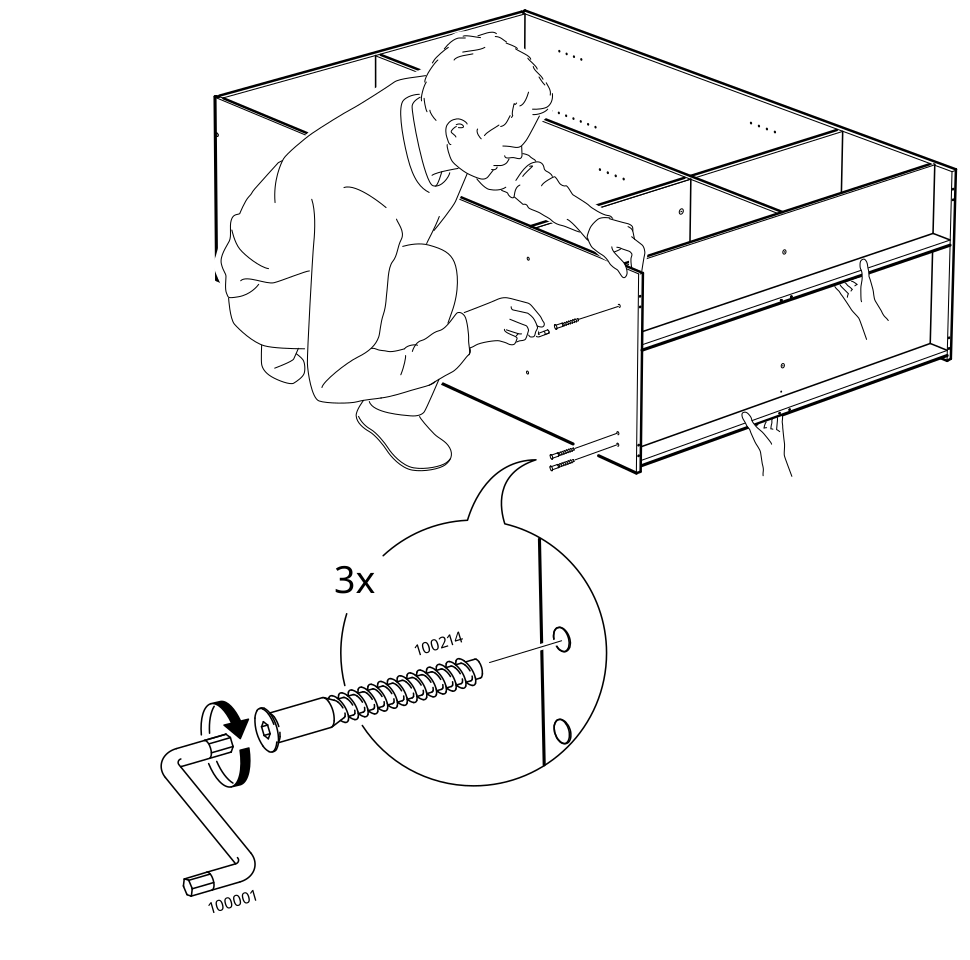
The assembler secures the drawer/front assembly with three screws while turning them with an Allen key.
Step 21
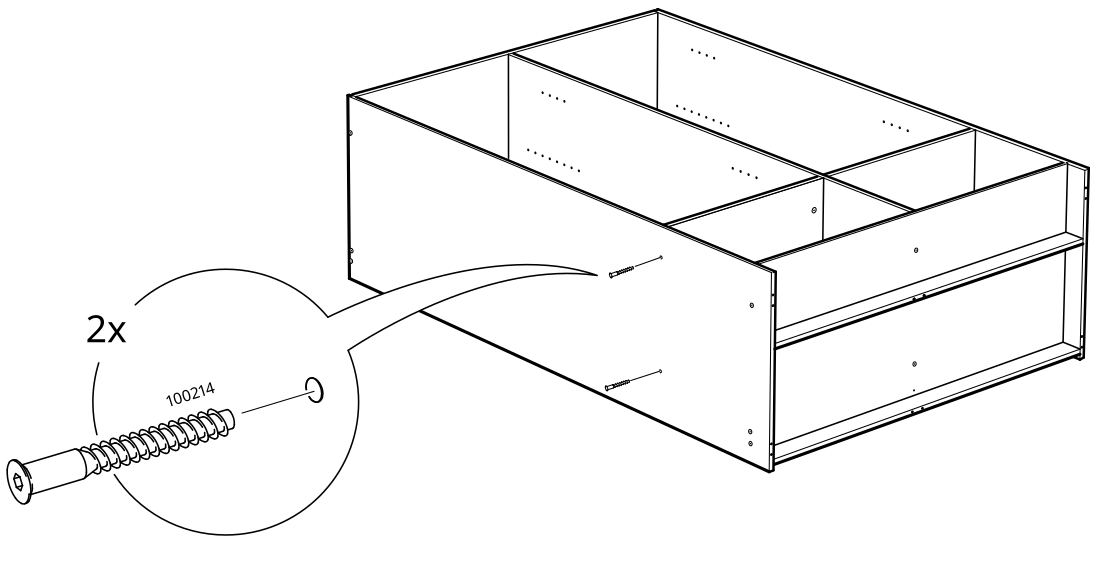
The assembler secures the assembly with two screws labeled 100214.
Step 22
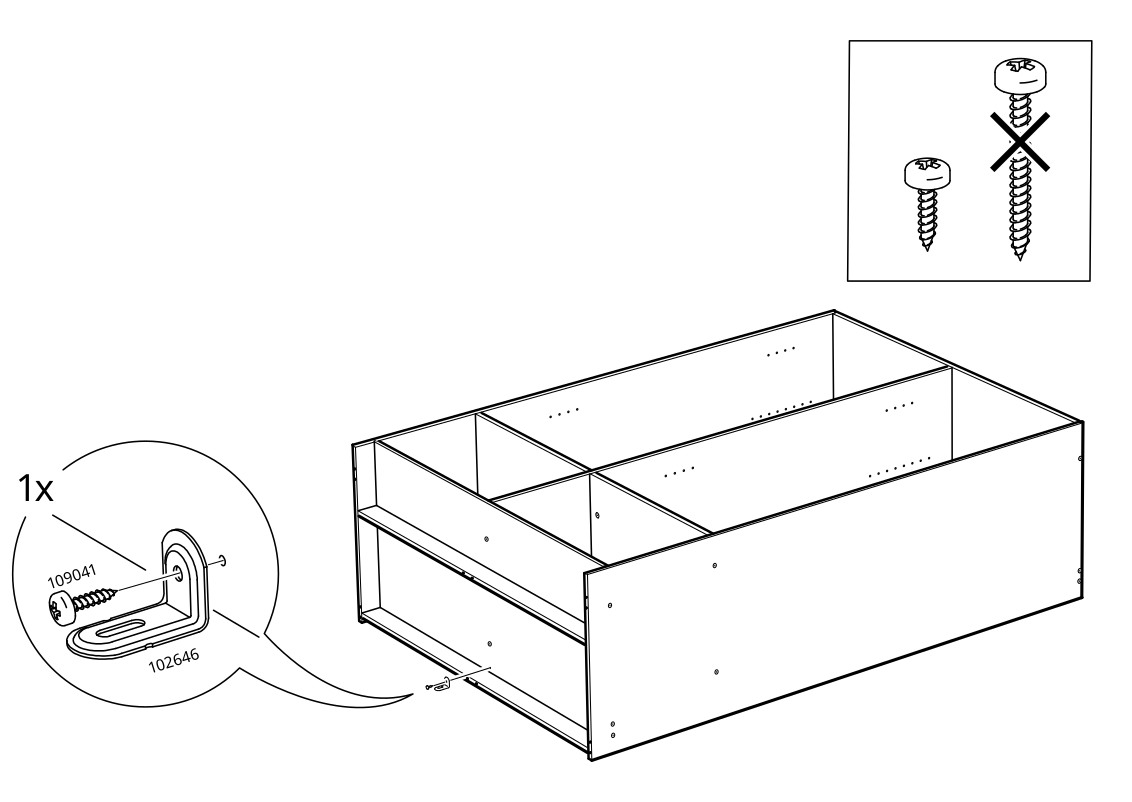
The 102646 mounting bracket is secured to the assembled cabinet with one 109041 screw, using the shorter screw and not the longer screw shown crossed out.
Step 23
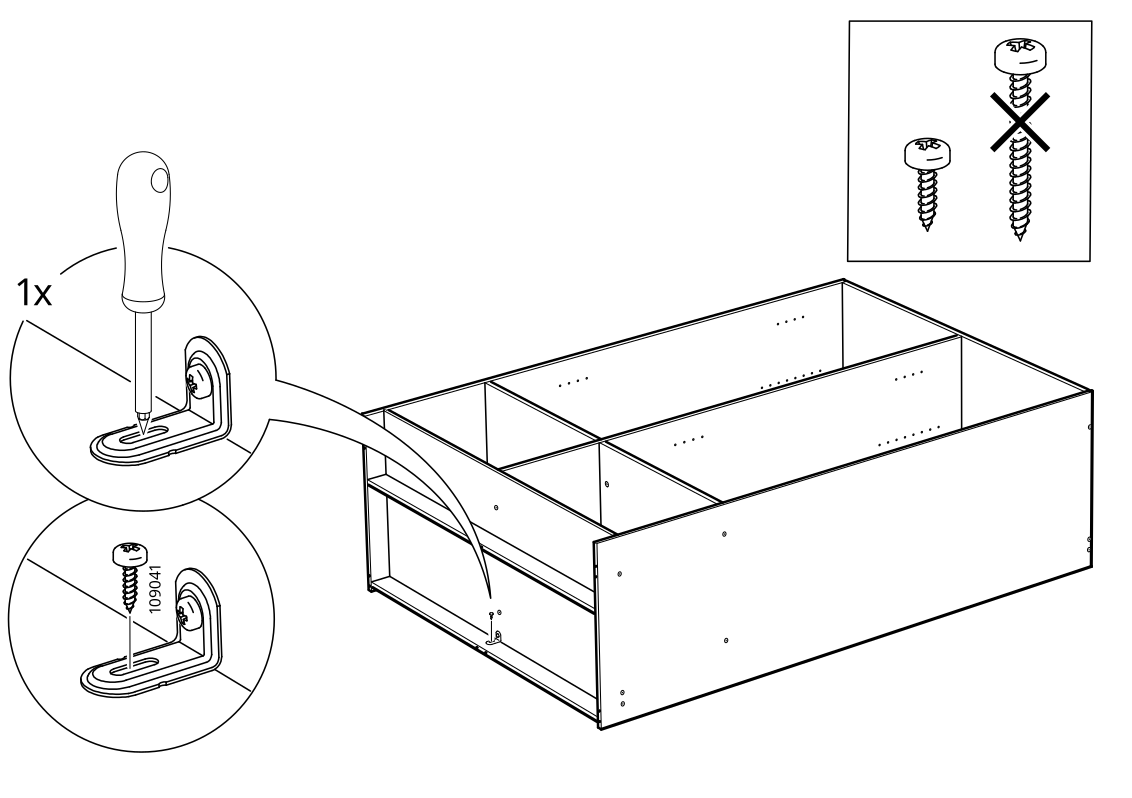
The 102646 mounting bracket is adjusted and the 109041 screw is tightened with a screwdriver.
Step 24
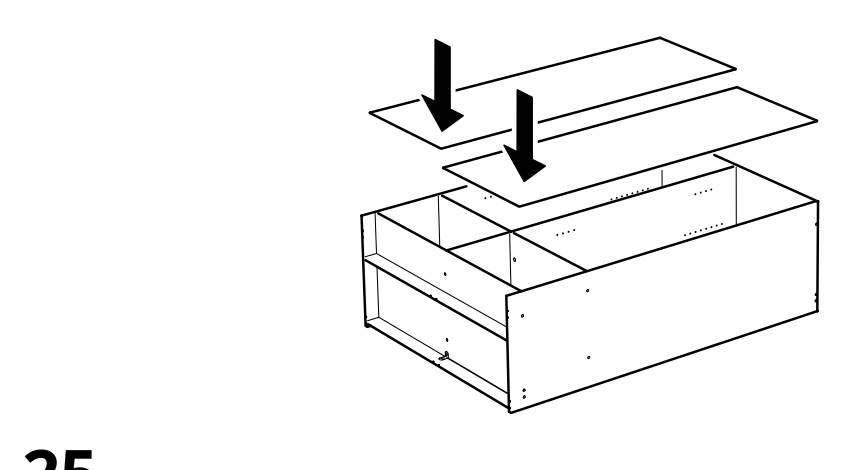
Place the two panels onto the assembled drawer unit as indicated by the downward arrows.
Step 25
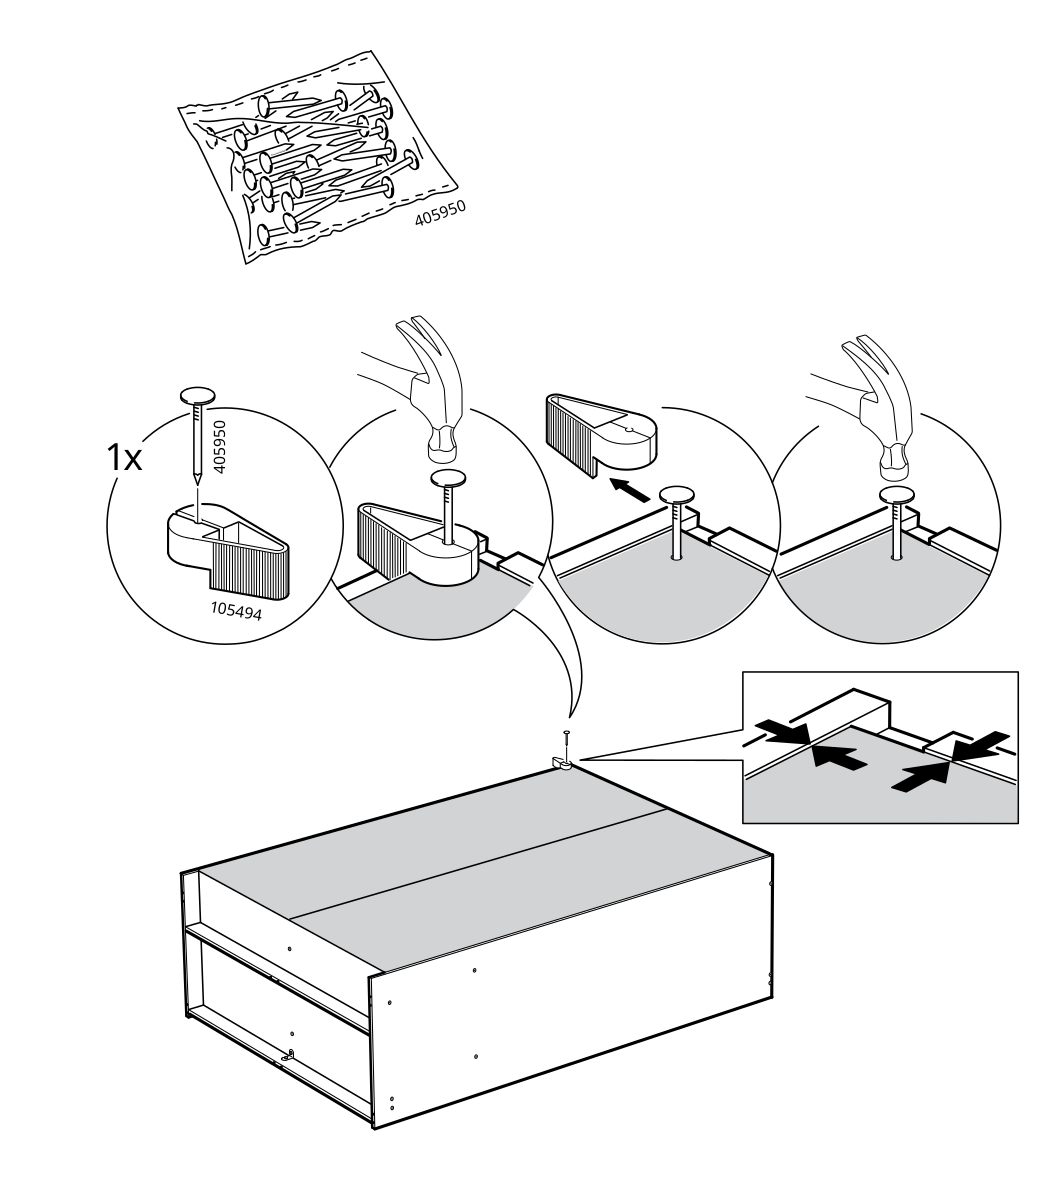
Fasten the 105494 brackets to the drawer assembly using 405950 nails and a hammer, then press the indicated components into position.
Step 26
Secure the upper panel to the cabinet using two 405950 screws.
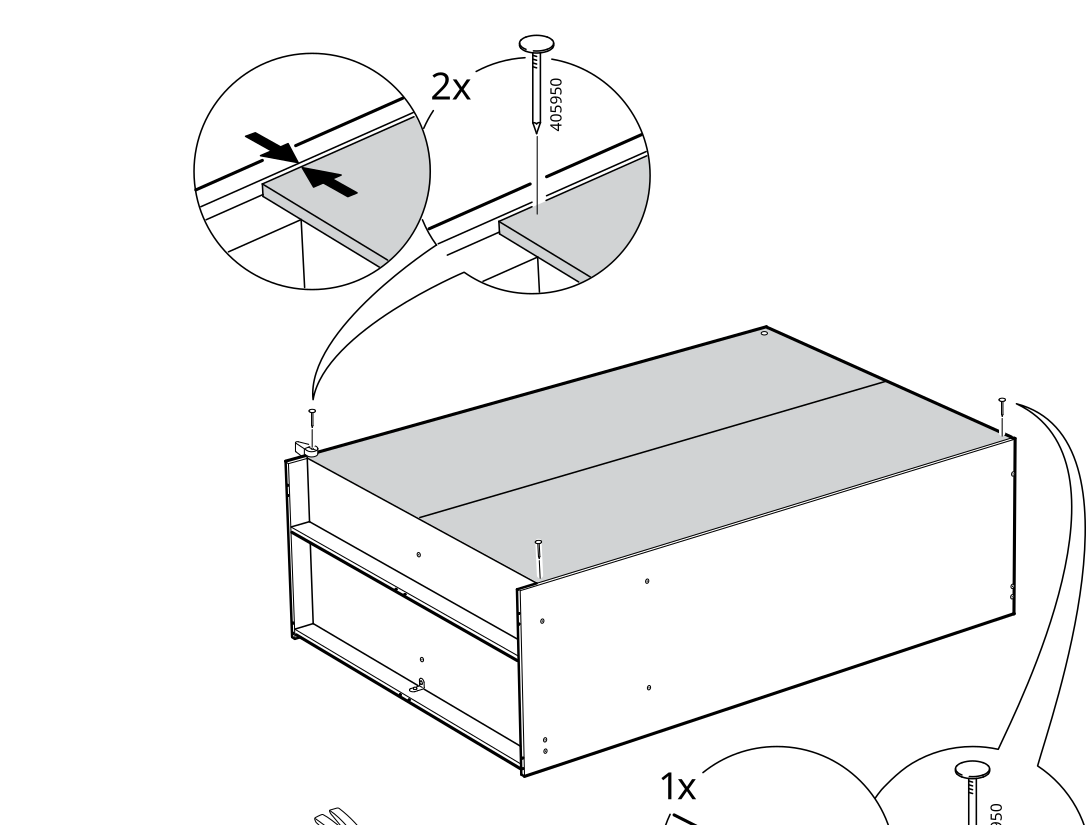
Step 27
Fasten the cabinet panels with 405950 screws, using a hammer for the indicated operation.
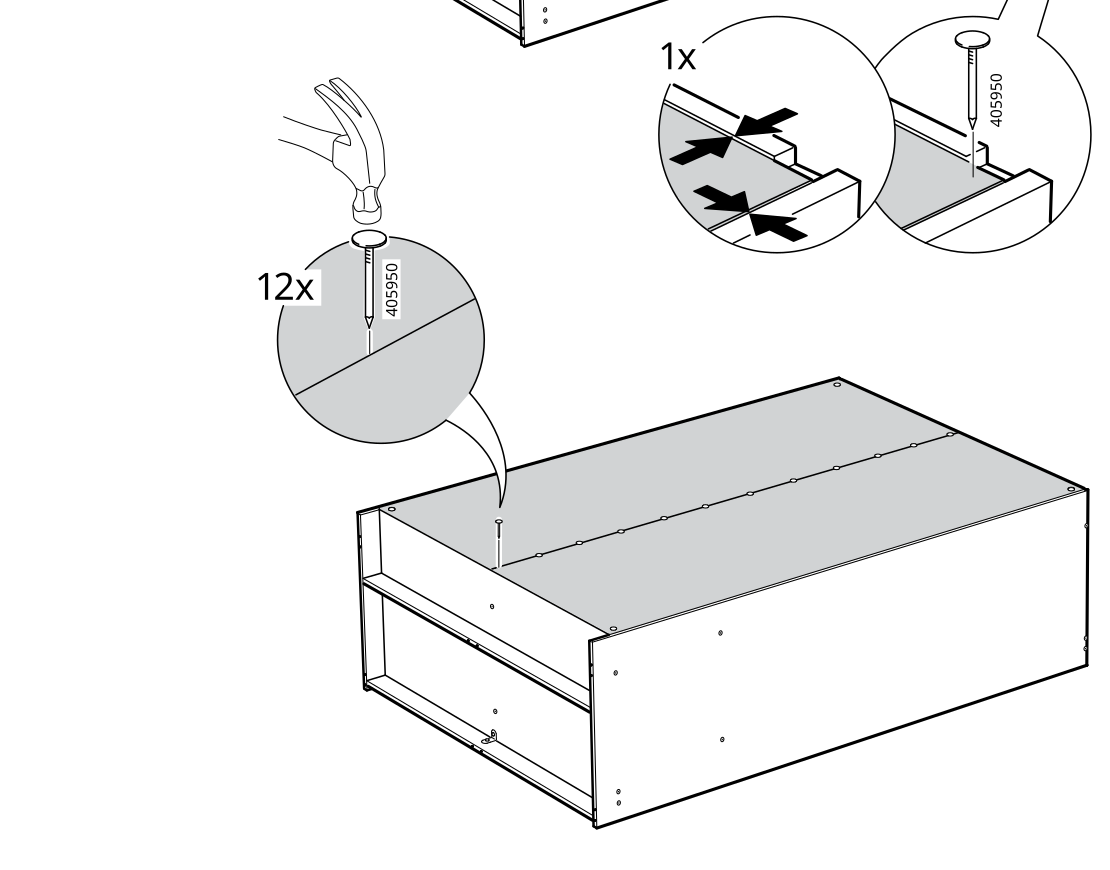
Step 28
Hammer 44 fasteners through the brackets and then place the brackets along the assembled cabinet panels as shown.
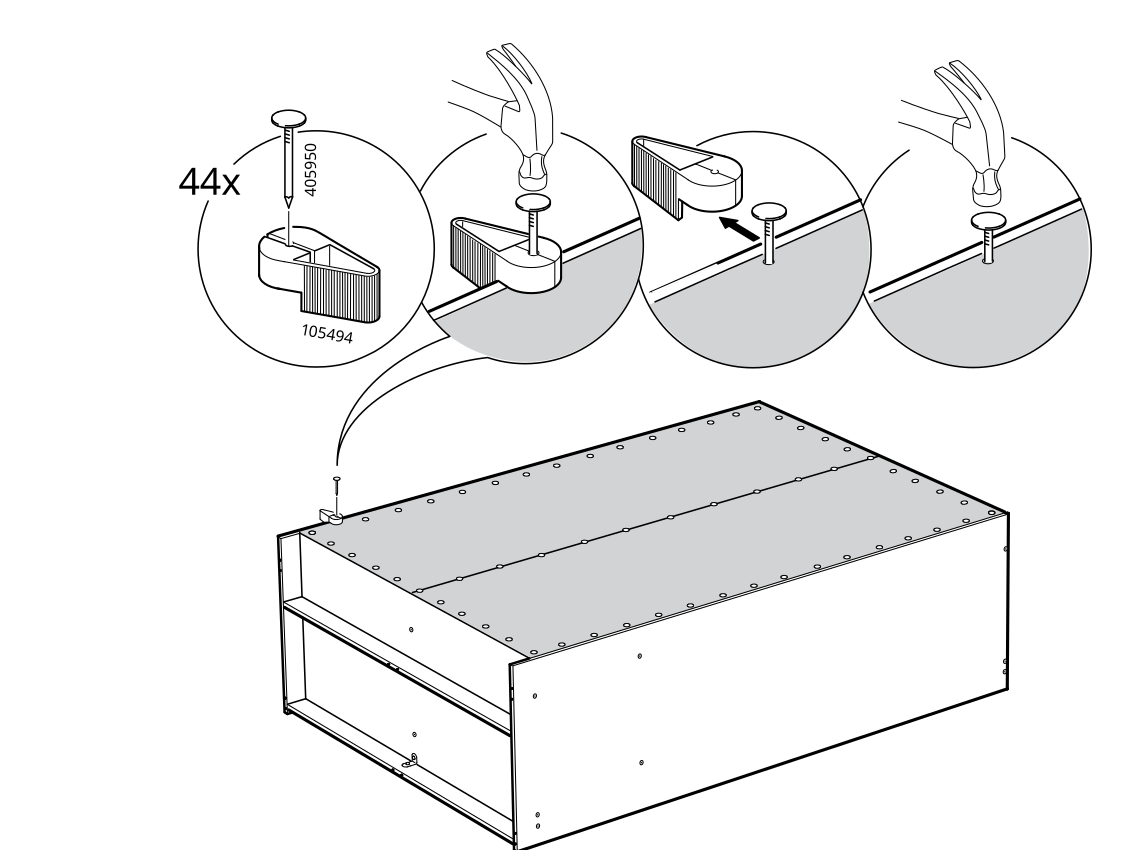
Step 29
Press six 153548 components into the front edges of the assembled cabinet sections.
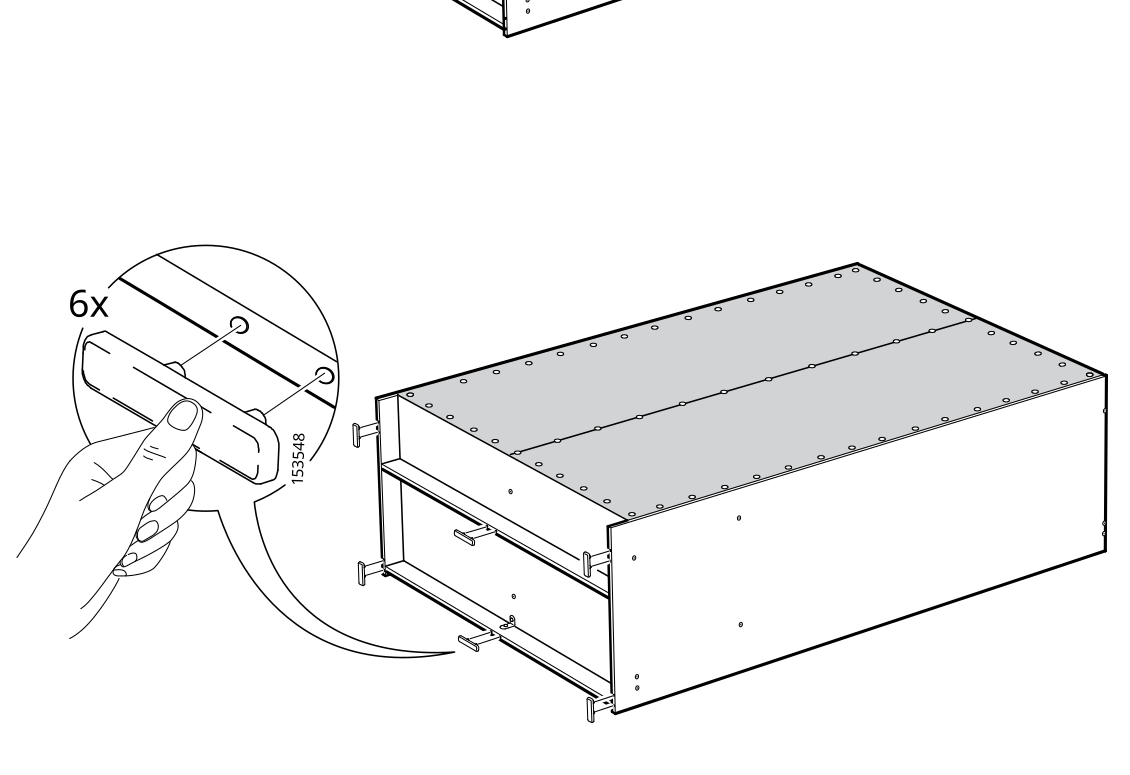
Safety warning
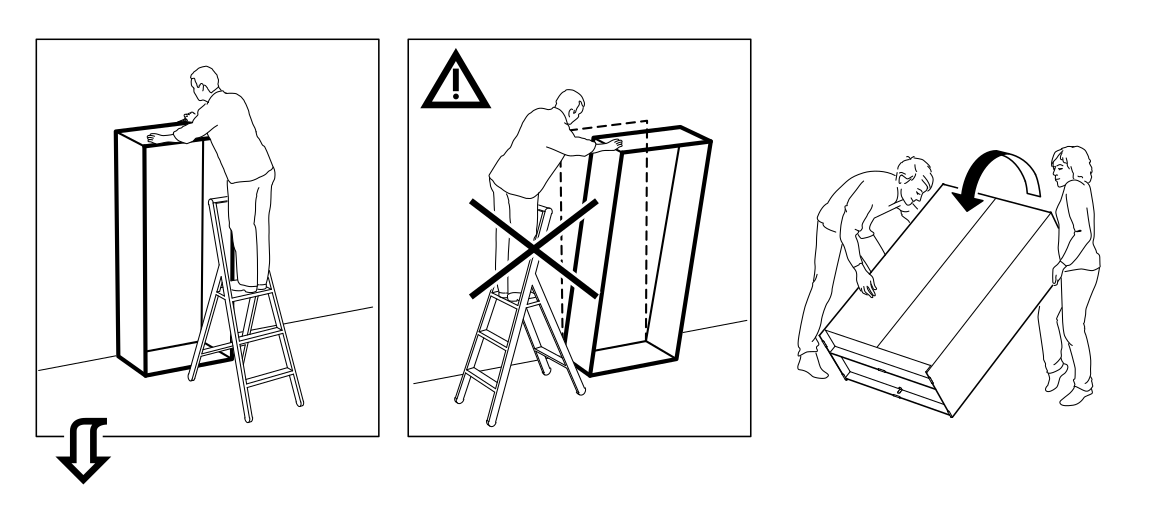
Safety guidance shows not standing on a ladder while working on the cabinet, not leaning or applying excessive force that could tip the cabinet, and rotating or repositioning the cabinet with two people.
Step 30
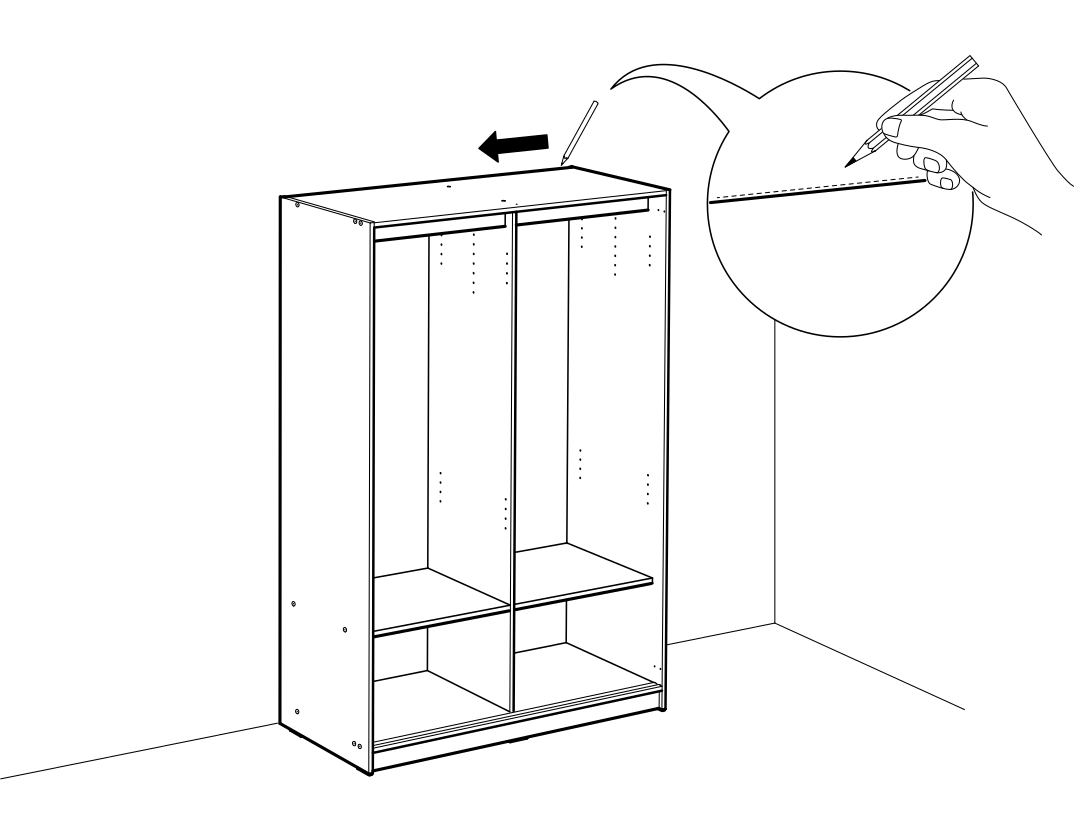
Mark the indicated positions along the cabinet's top panel with a pencil.
Step 31
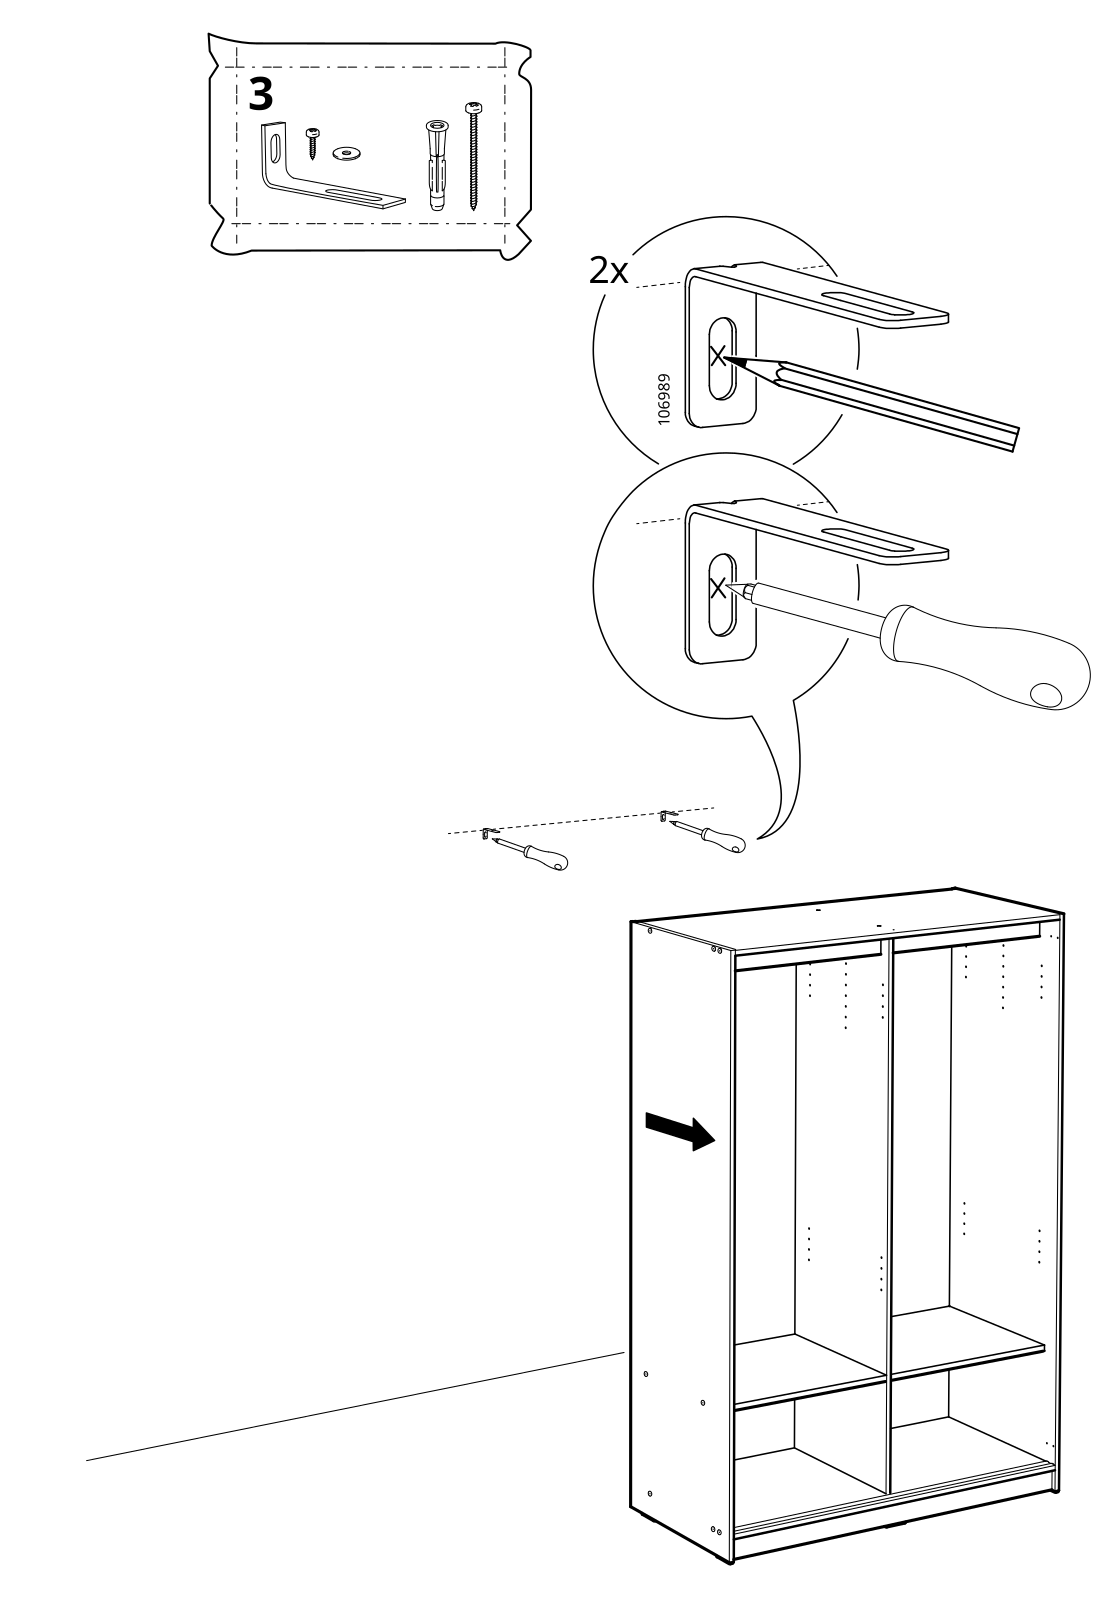
The installer adjusts two slotted mounting brackets with a screwdriver and then fits the brackets into the cabinet at the indicated locations.
Before you begin
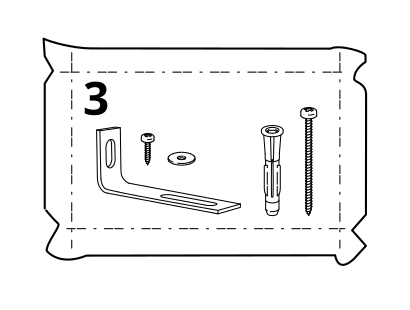
A parts-bag illustration marked 3 shows a slotted mounting bracket, screws, washers, and wall-plug-like hardware.
Step 32
Fasten the cabinet to the wall using two wall-fastening assemblies shown in the close-up.
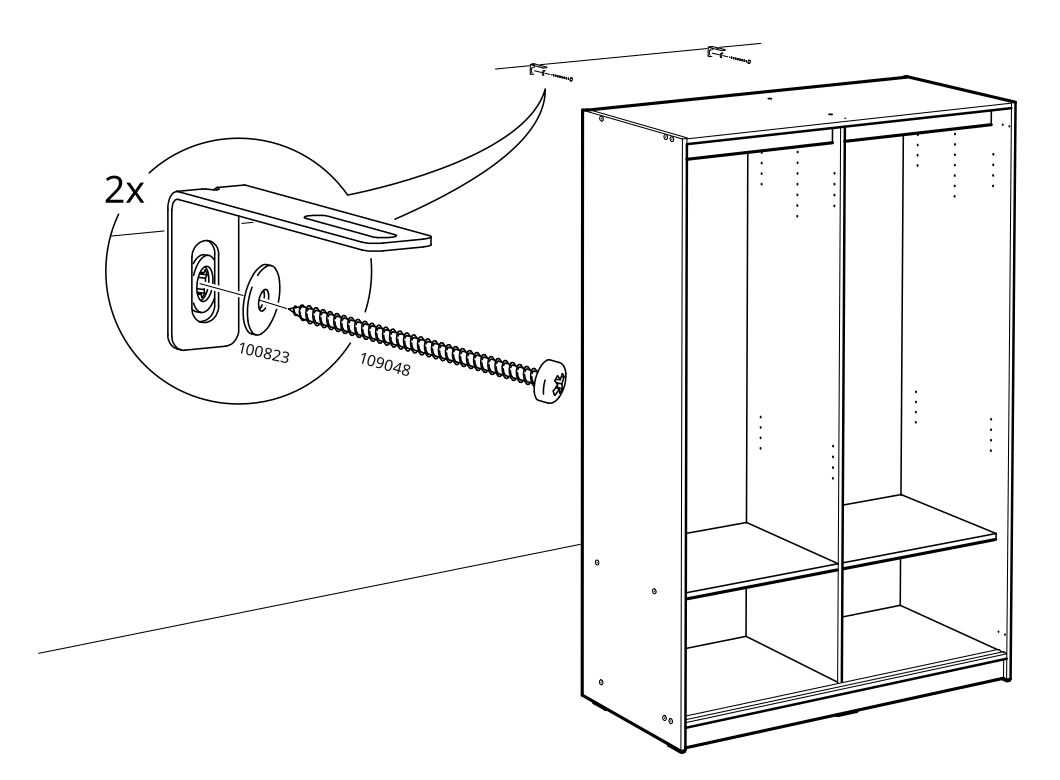
Step 33
Move the cabinet in the direction indicated by the left-pointing arrow.
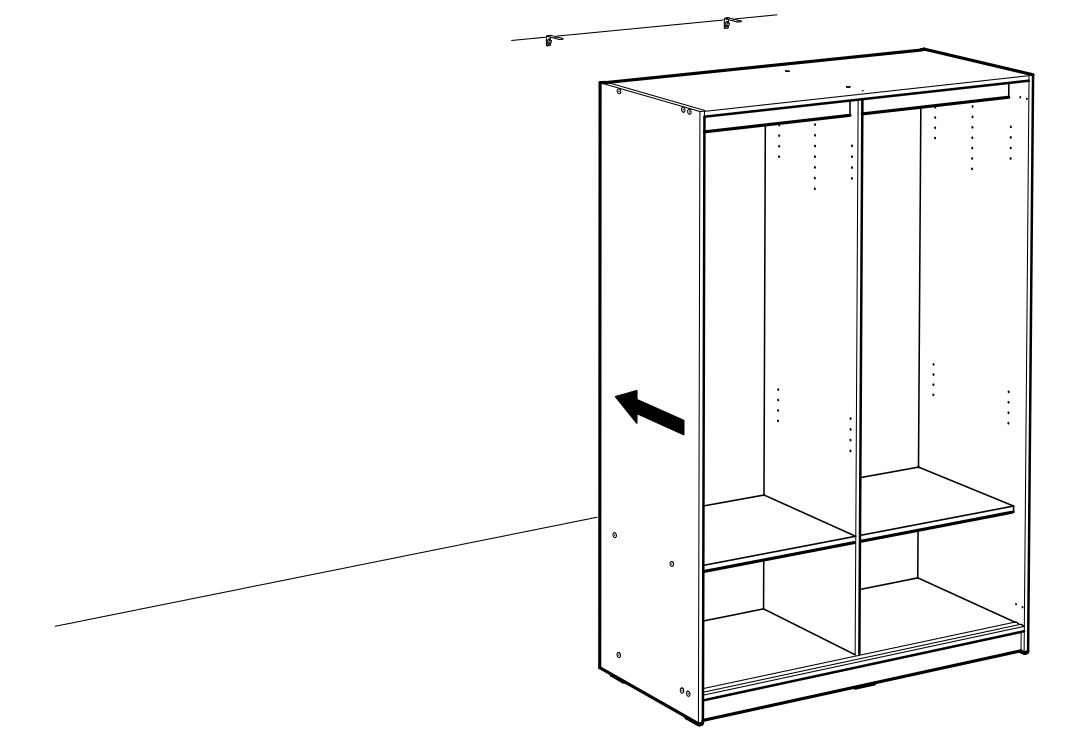
Step 34
Secure the upper panels to the cabinet using two screws and washers, as shown in the magnified detail.
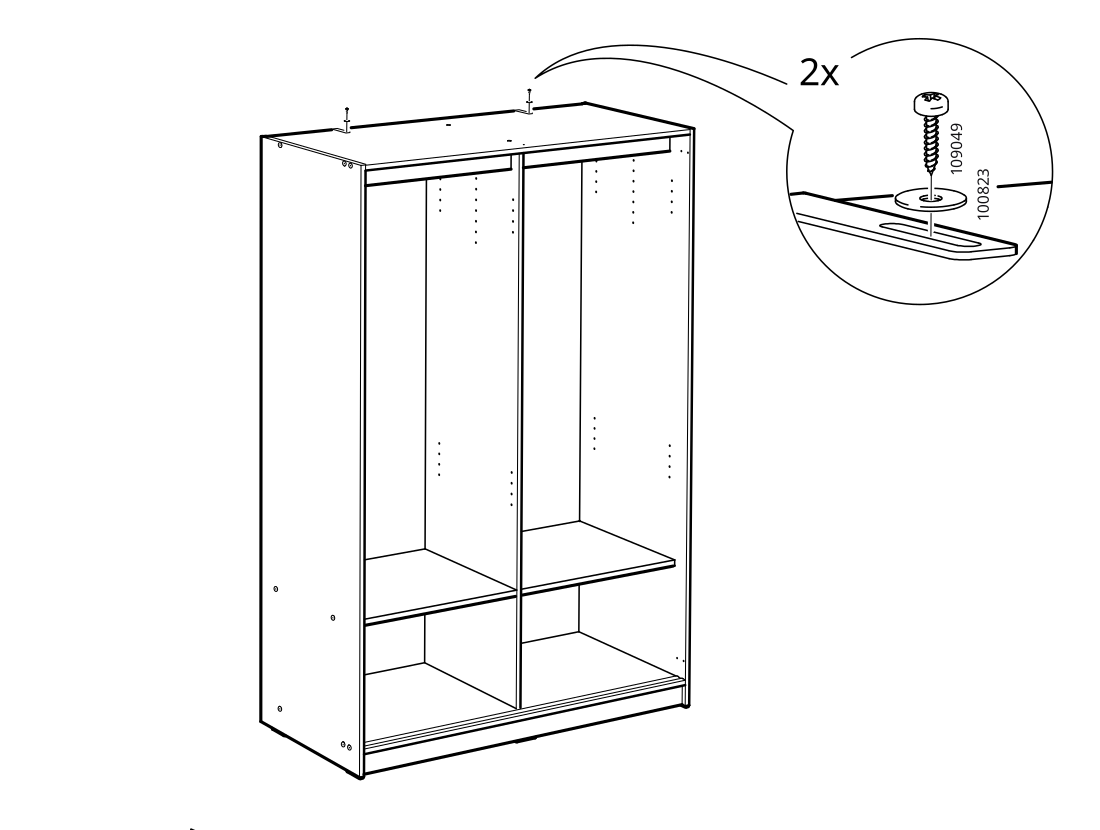
Step 35
Install the upper interior brackets in the cabinet using the supplied screws, following the indicated bracket orientation.
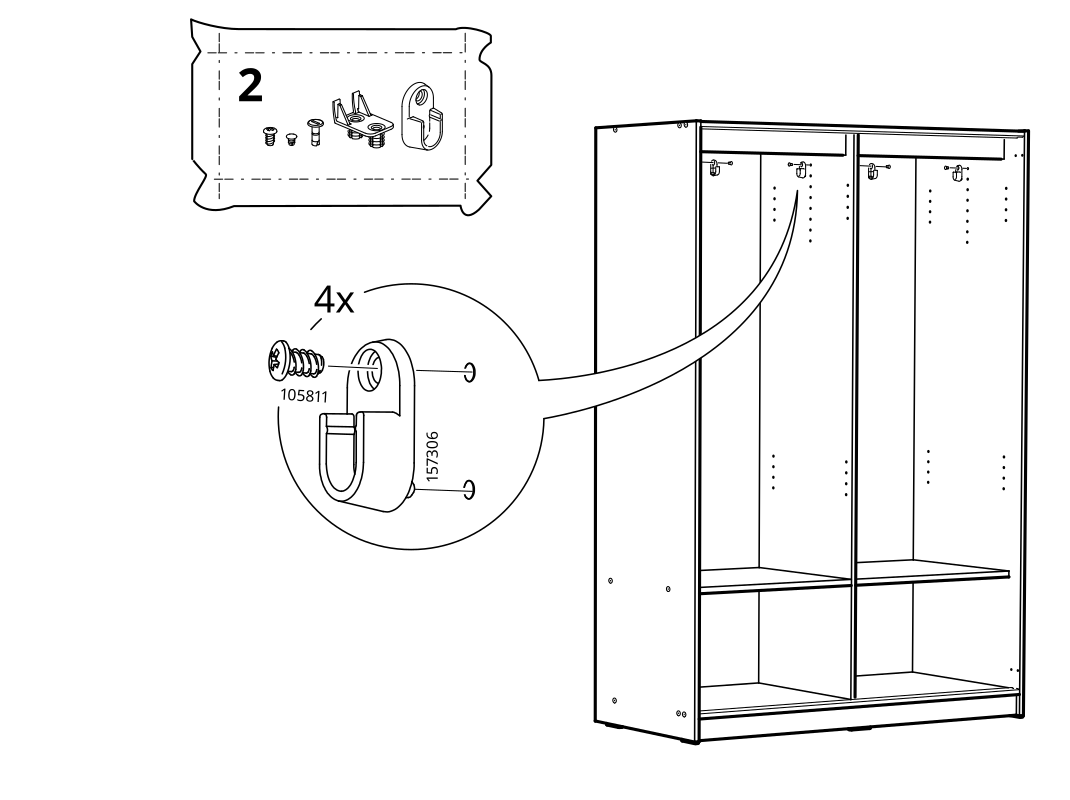
Step 36
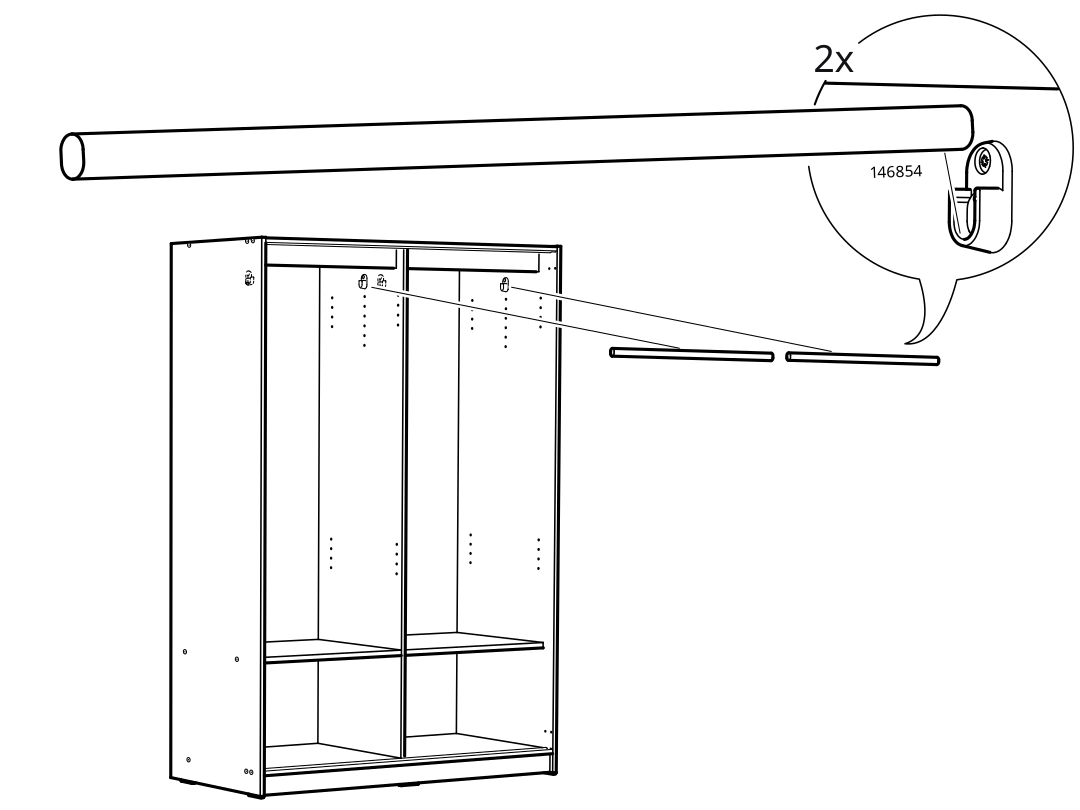
Install the two horizontal rails or rods in the upper section of the cabinet using the indicated fittings.
Step 37
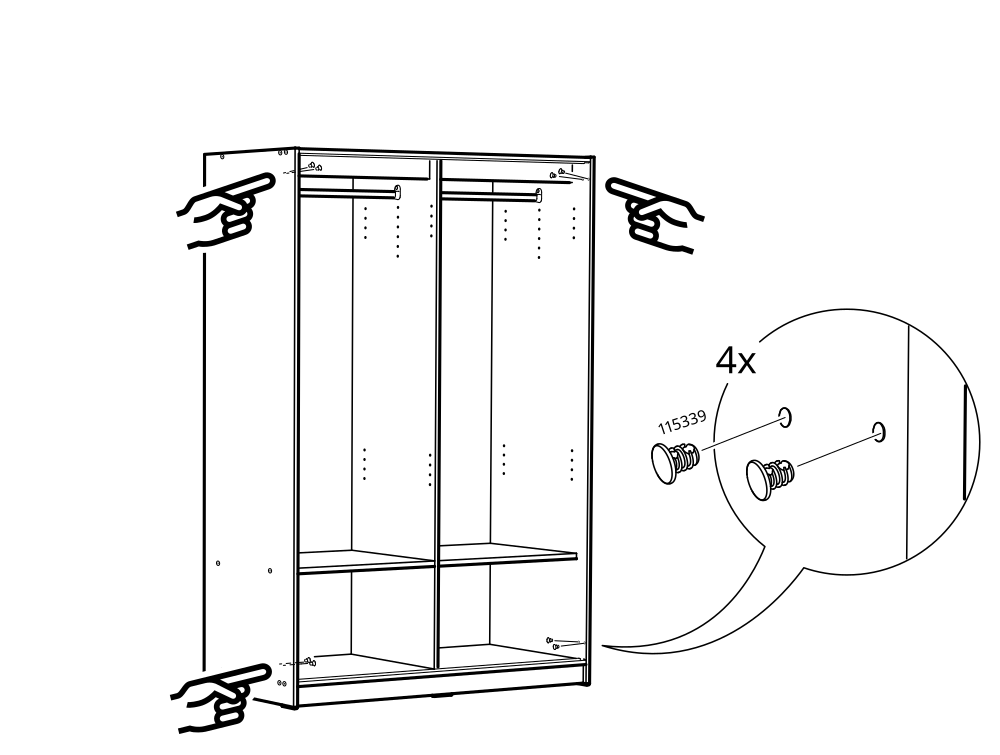
Secure the cabinet assembly at the indicated locations using four fasteners while holding the panels in position.
Step 38
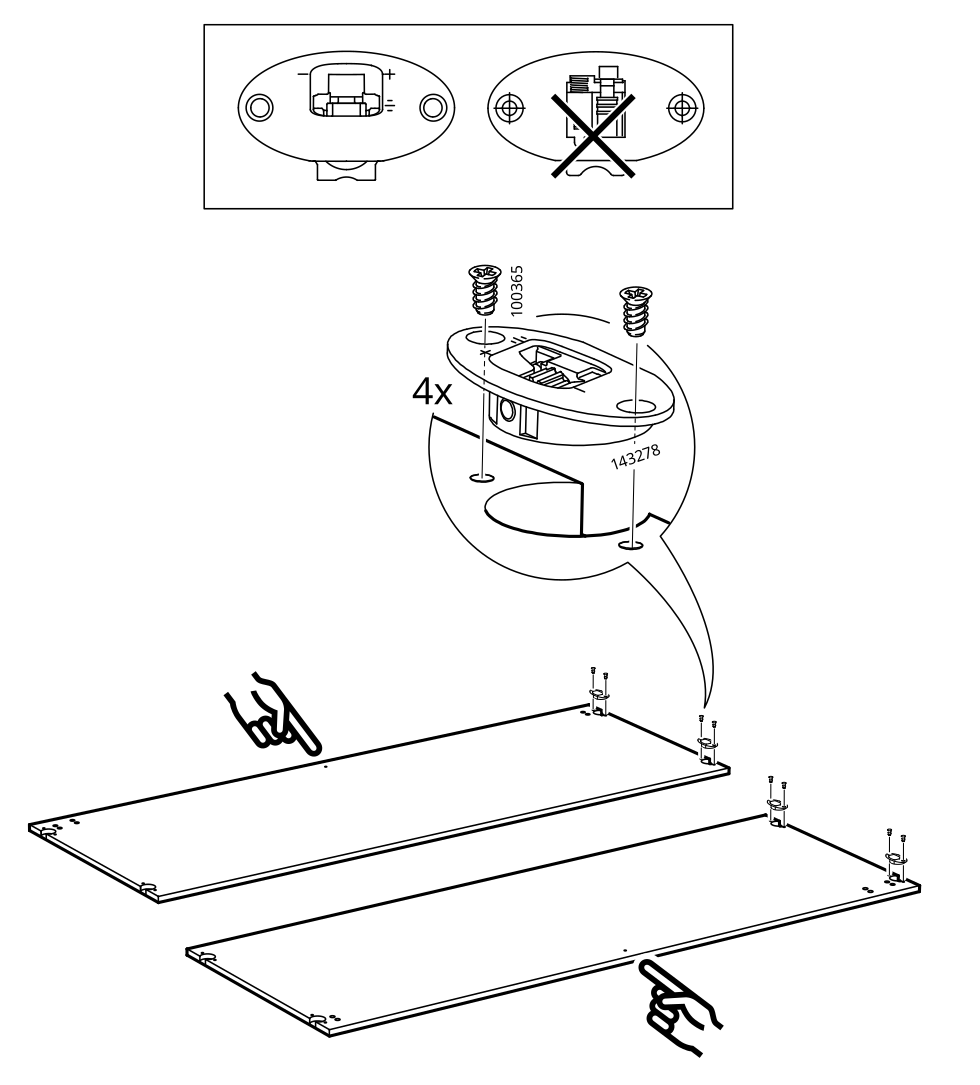
Secure the 143278 component with four 100365 screws, then fit the hardware onto the two panels as shown.
Step 39
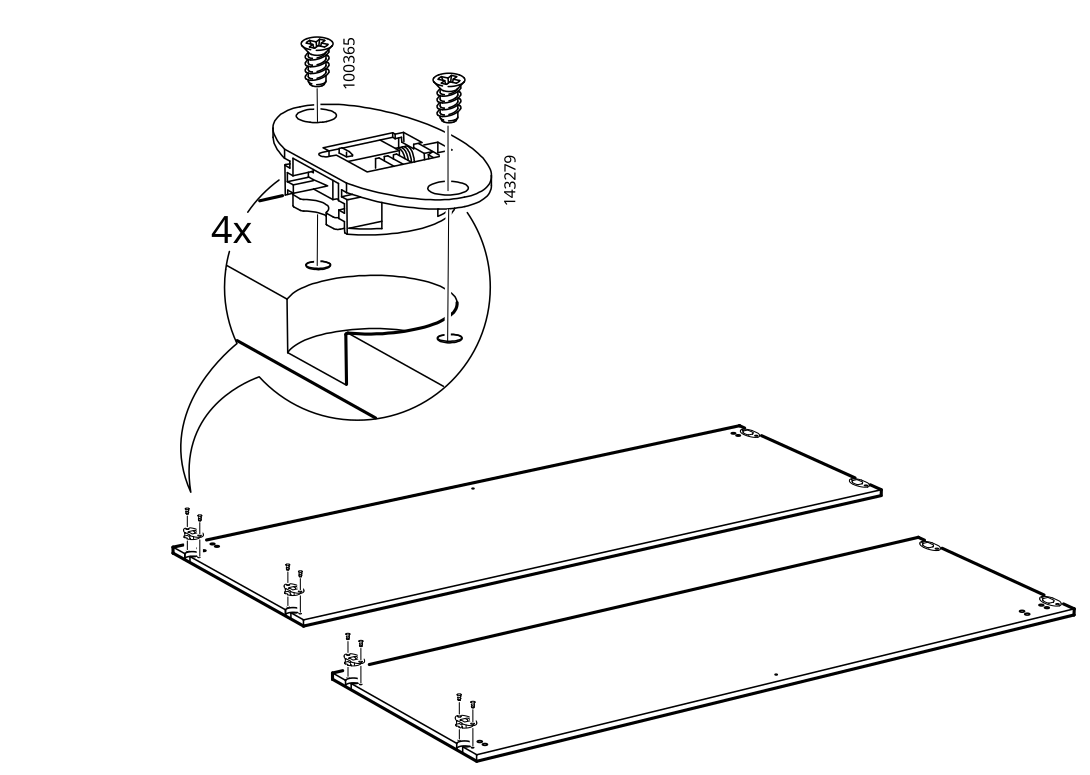
Attach four hinge assemblies to the two cabinet panels using the indicated screws.
Step 40
Insert and orient the large cabinet panel into the cabinet while following the illustrated alignment and orientation guidance.
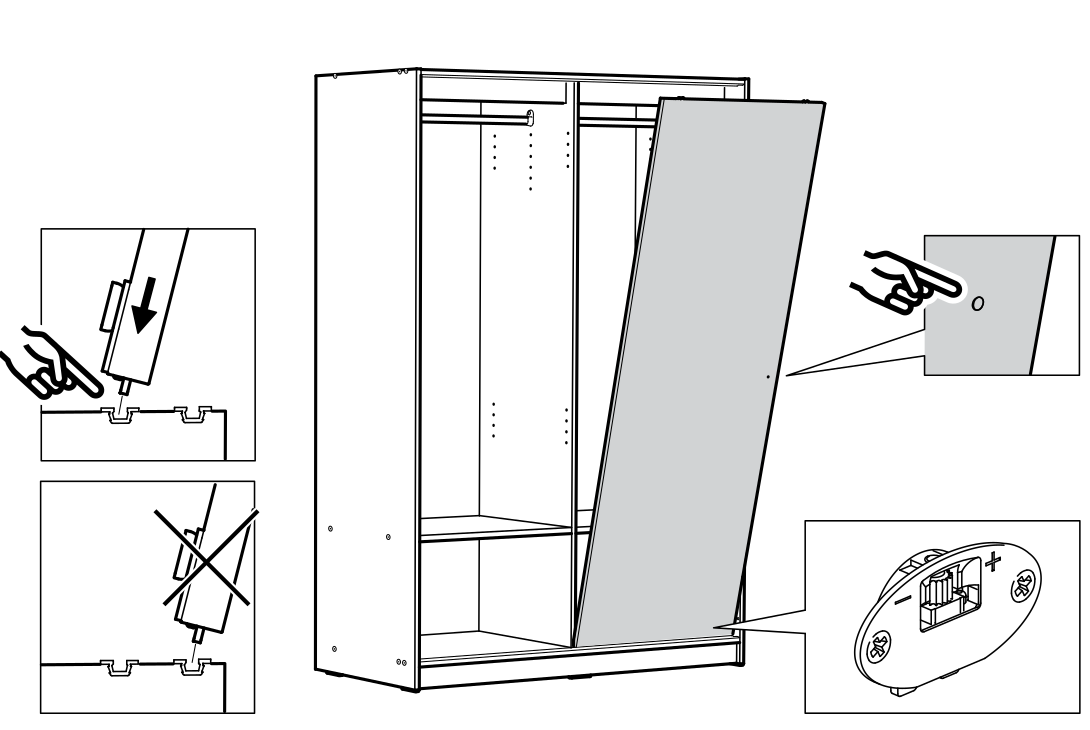
Step 41
Adjusts the cabinet door and hinge hardware by lifting the door and pressing the hinge mechanism into position as shown.
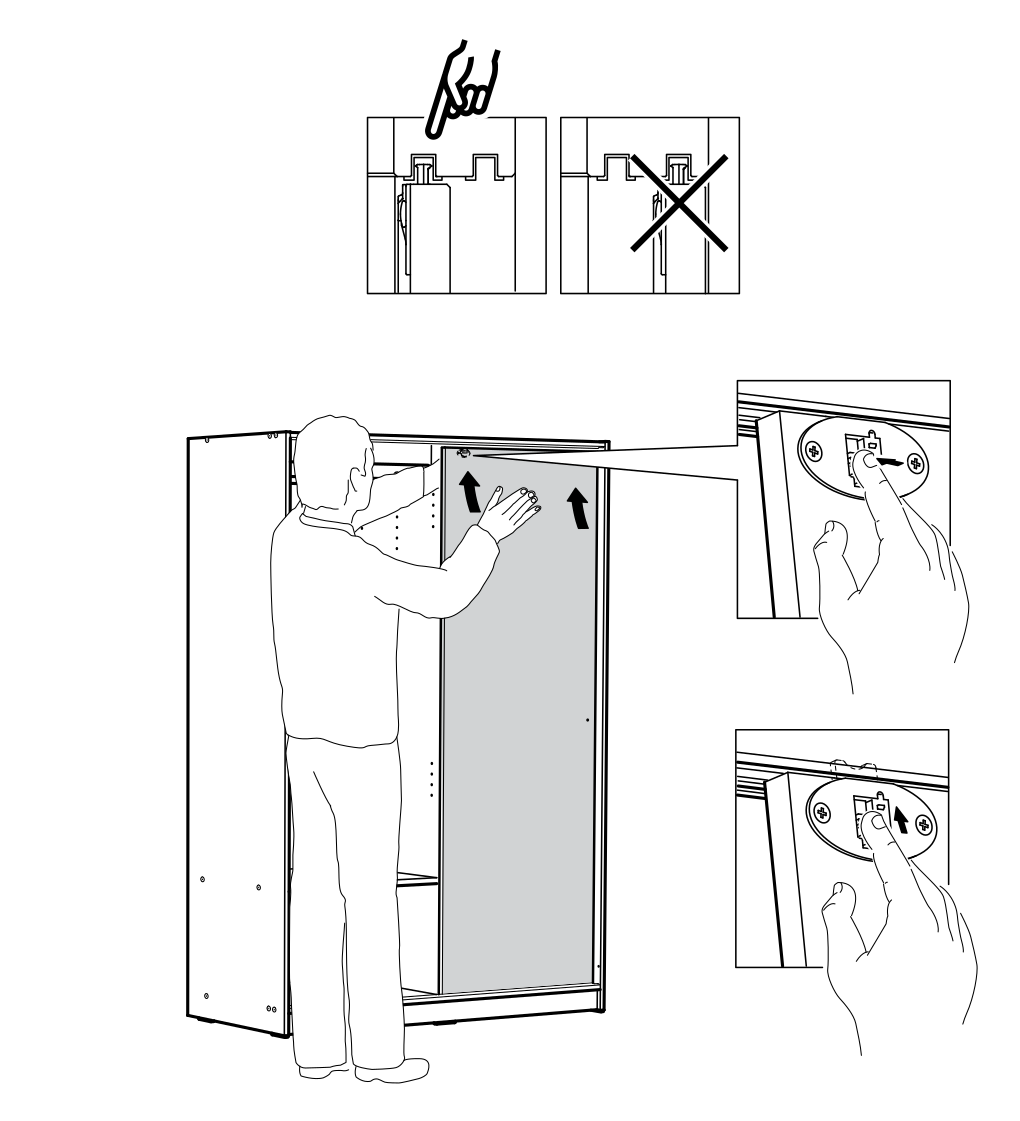
Step 42
Tilt the door panel into the cabinet, engage its fittings with the cabinet mounts, and secure the hardware as shown in the detail views.
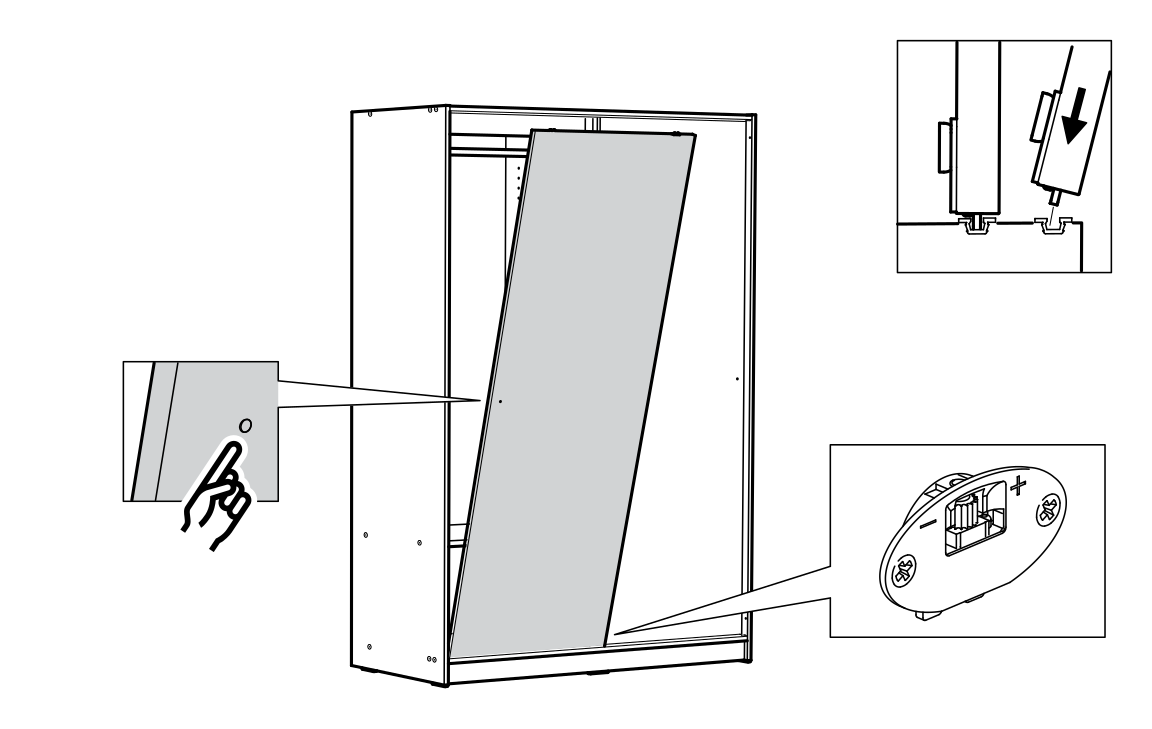
Step 43
Adjust and lock the installed door fittings, following the correct positioning detail and avoiding the crossed-out incorrect position.
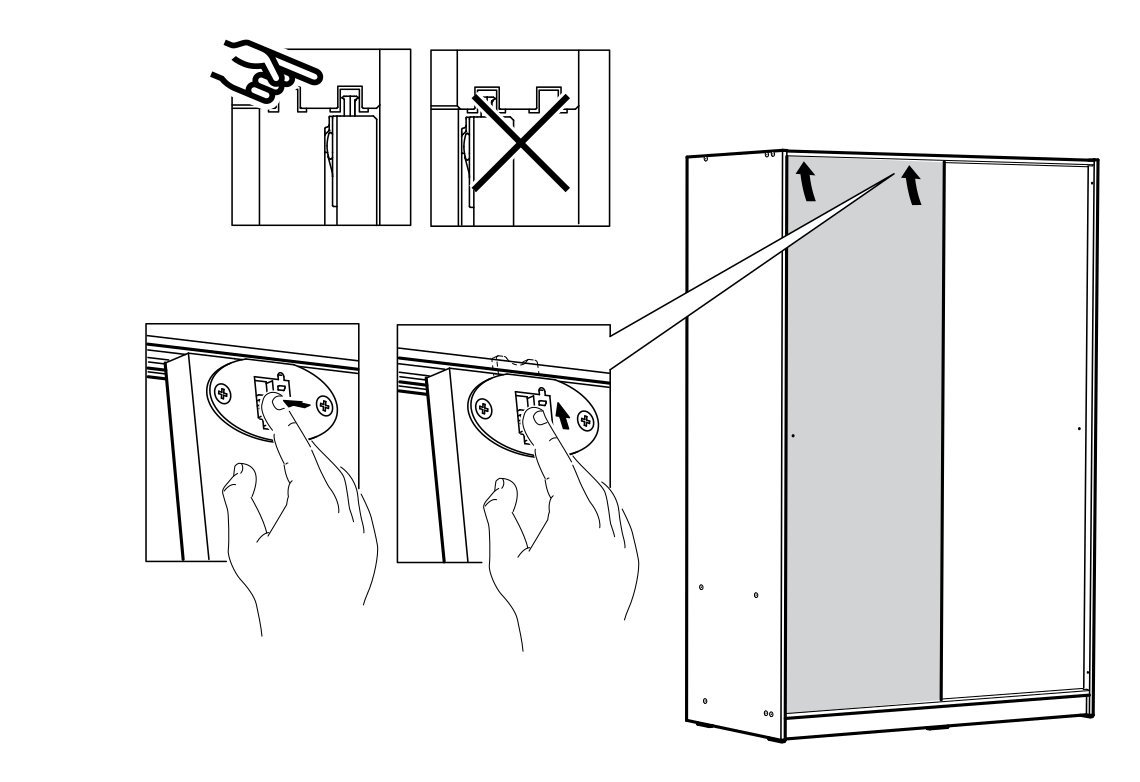
Step 44
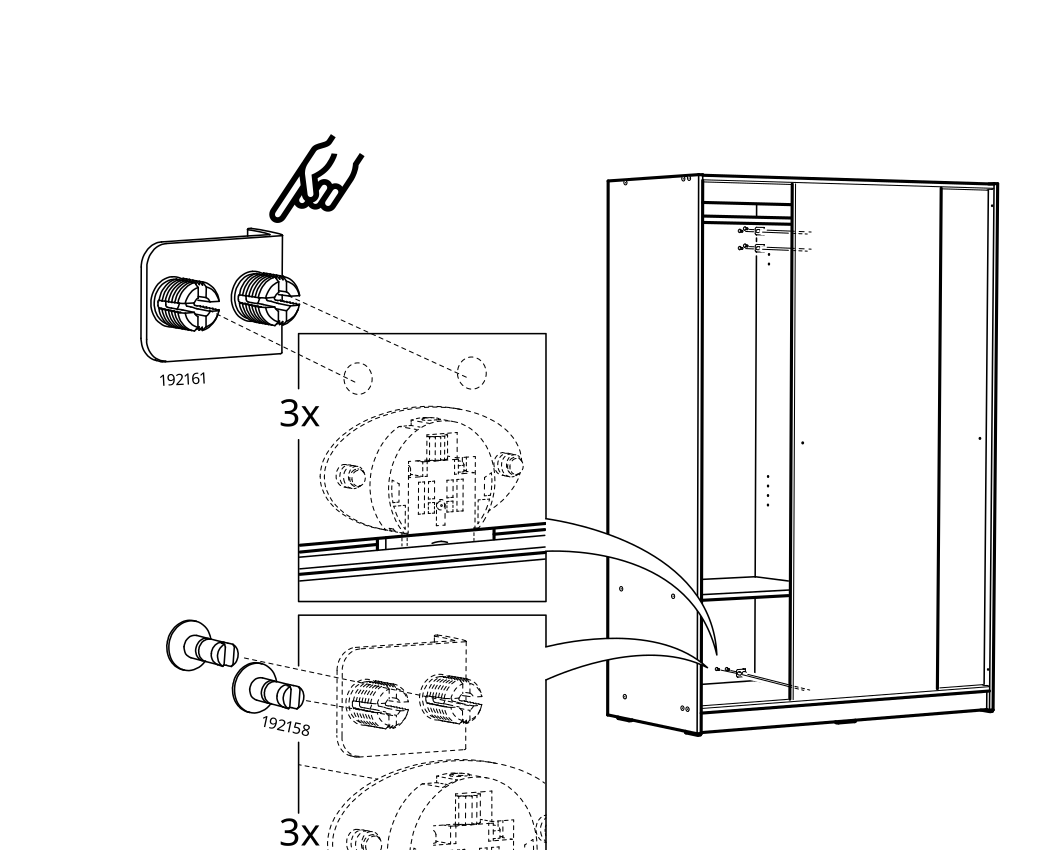
The user positions three 192161 fittings and three 192158 fittings on the cabinet at the indicated locations.
Step 45
Installs two hardware assemblies into the cabinet at the indicated mounting points.