VIHALS Bed frame
Before you begin
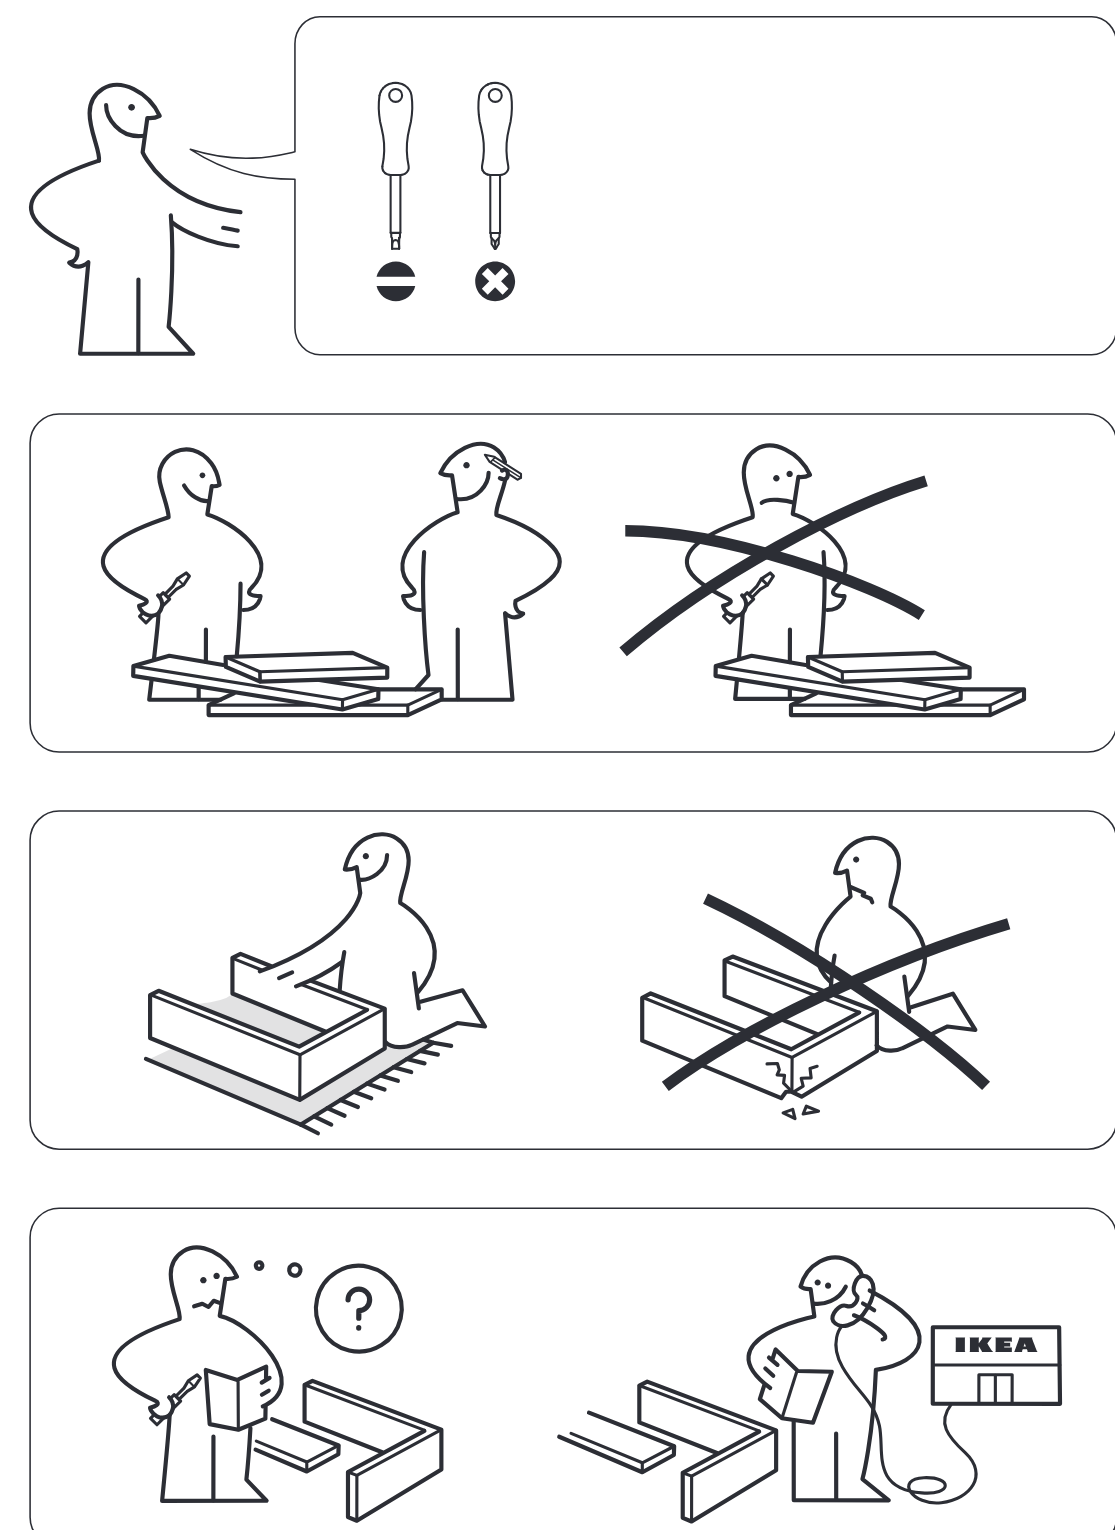
Preparation and safety panels show required tools (flathead and Phillips screwdrivers), advise two people for assembly rather than one, instruct assembling on a soft surface instead of directly on the floor, and indicate contacting IKEA for help if parts or instructions are unclear.
Step 1
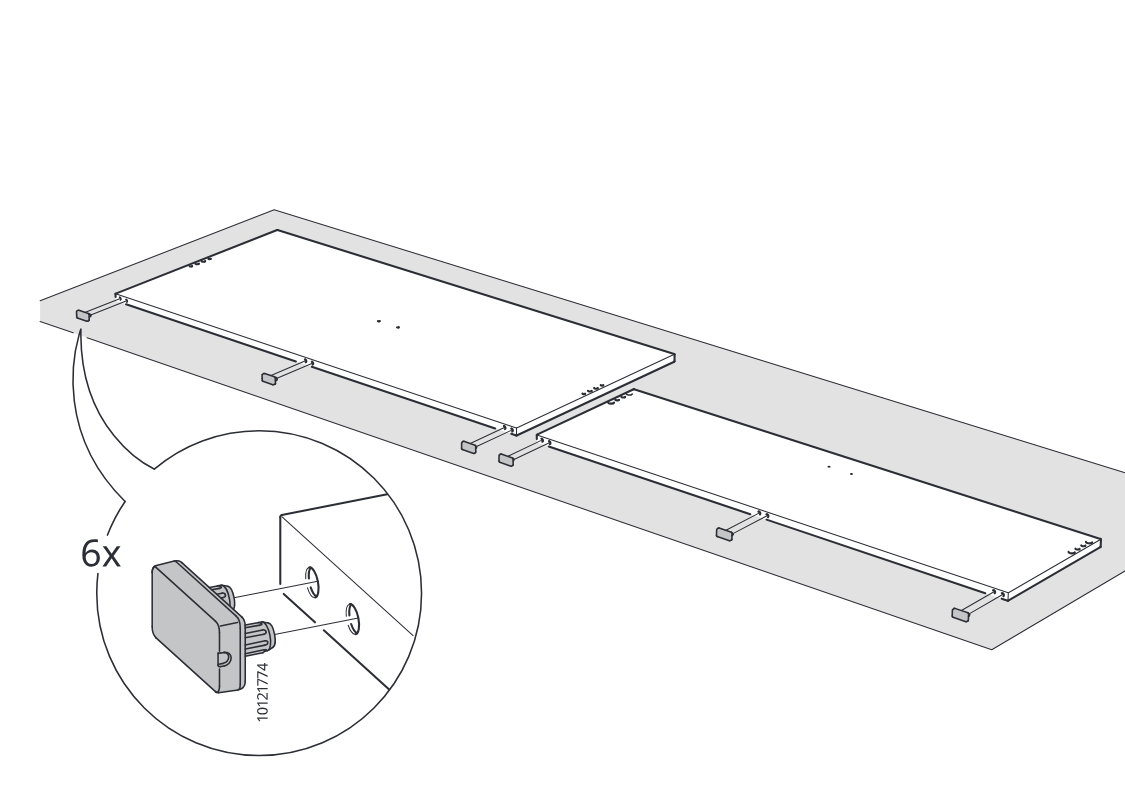
Six plastic fittings 10121774 are inserted into the predrilled holes along the edges of the two panels.
Step 2
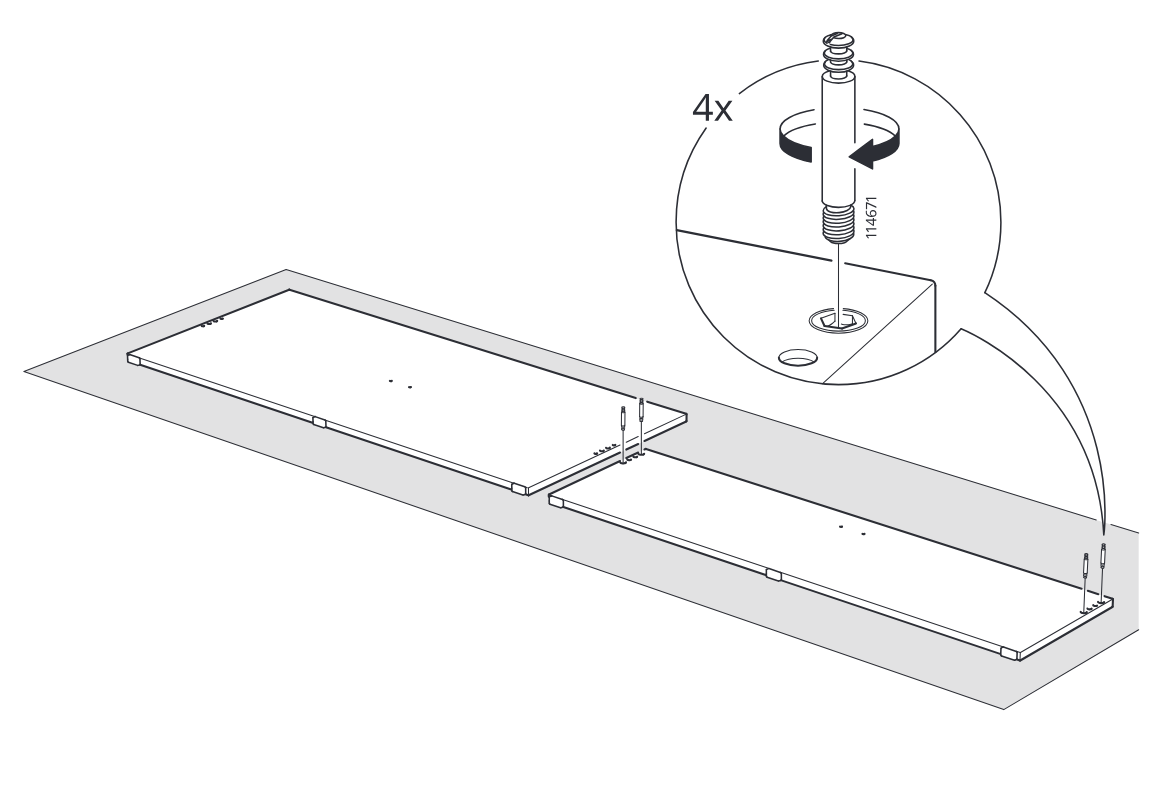
Four connector bolts 114671 are screwed into the indicated holes at the panel ends and center joint area.
Step 3
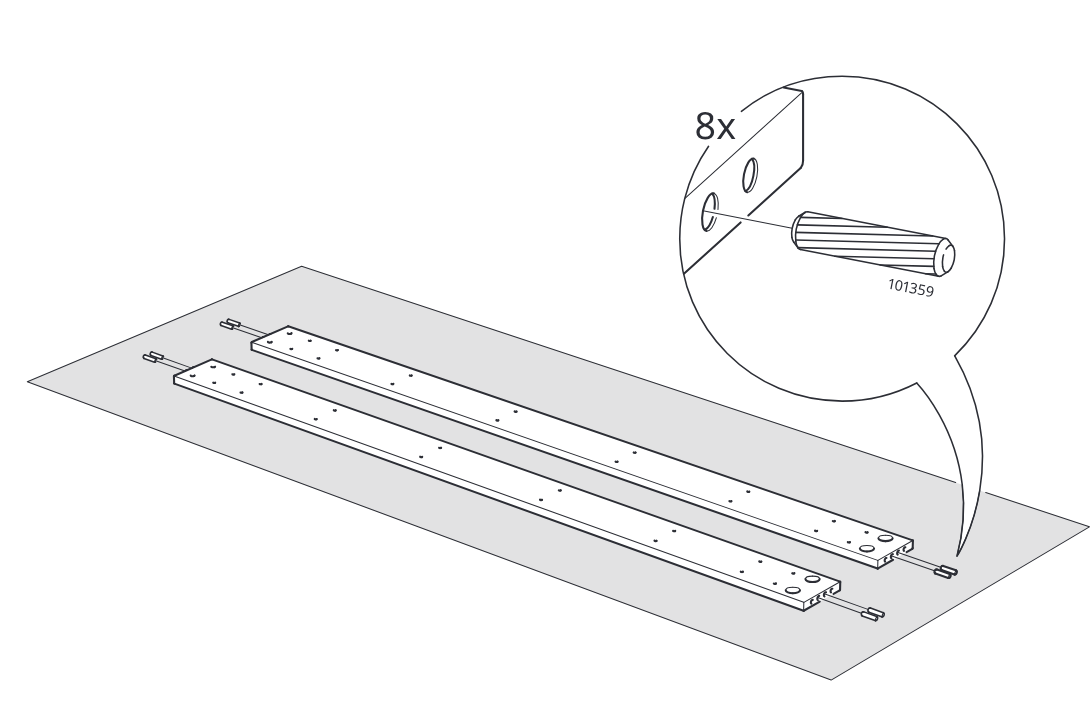
Insert 8 wooden dowels 101359 into the indicated holes at the ends of the two long panels.
Step 4
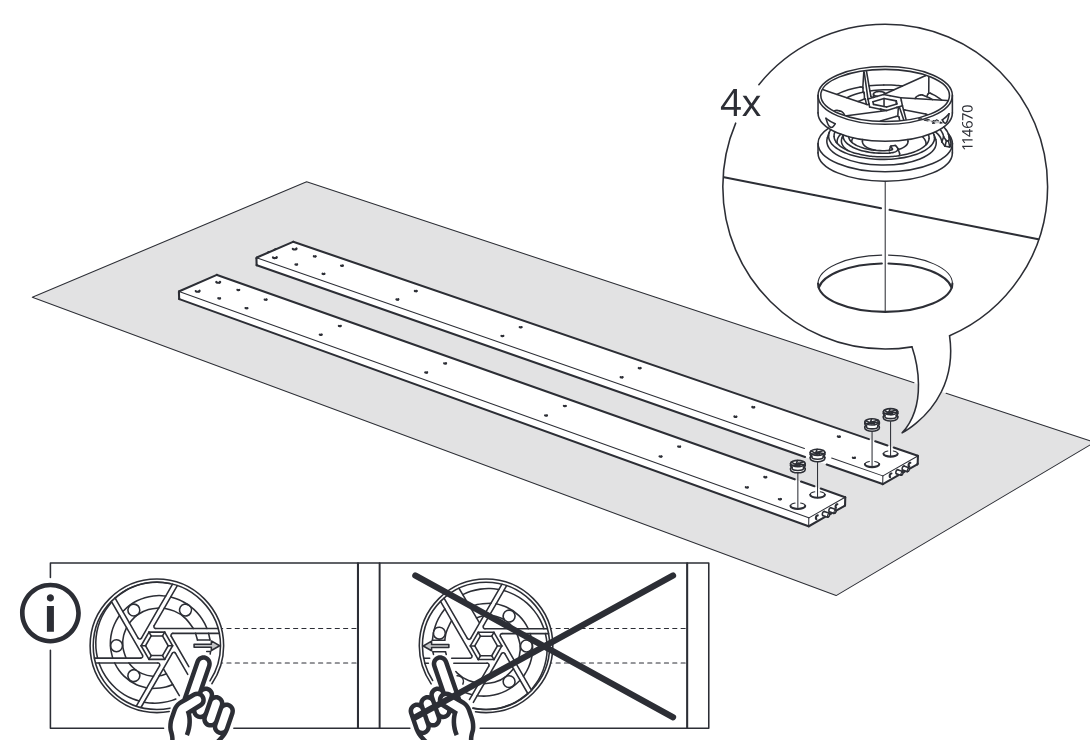
Place 4 cam locks 114670 into the large end holes of the two long panels in the shown orientation.
Step 5
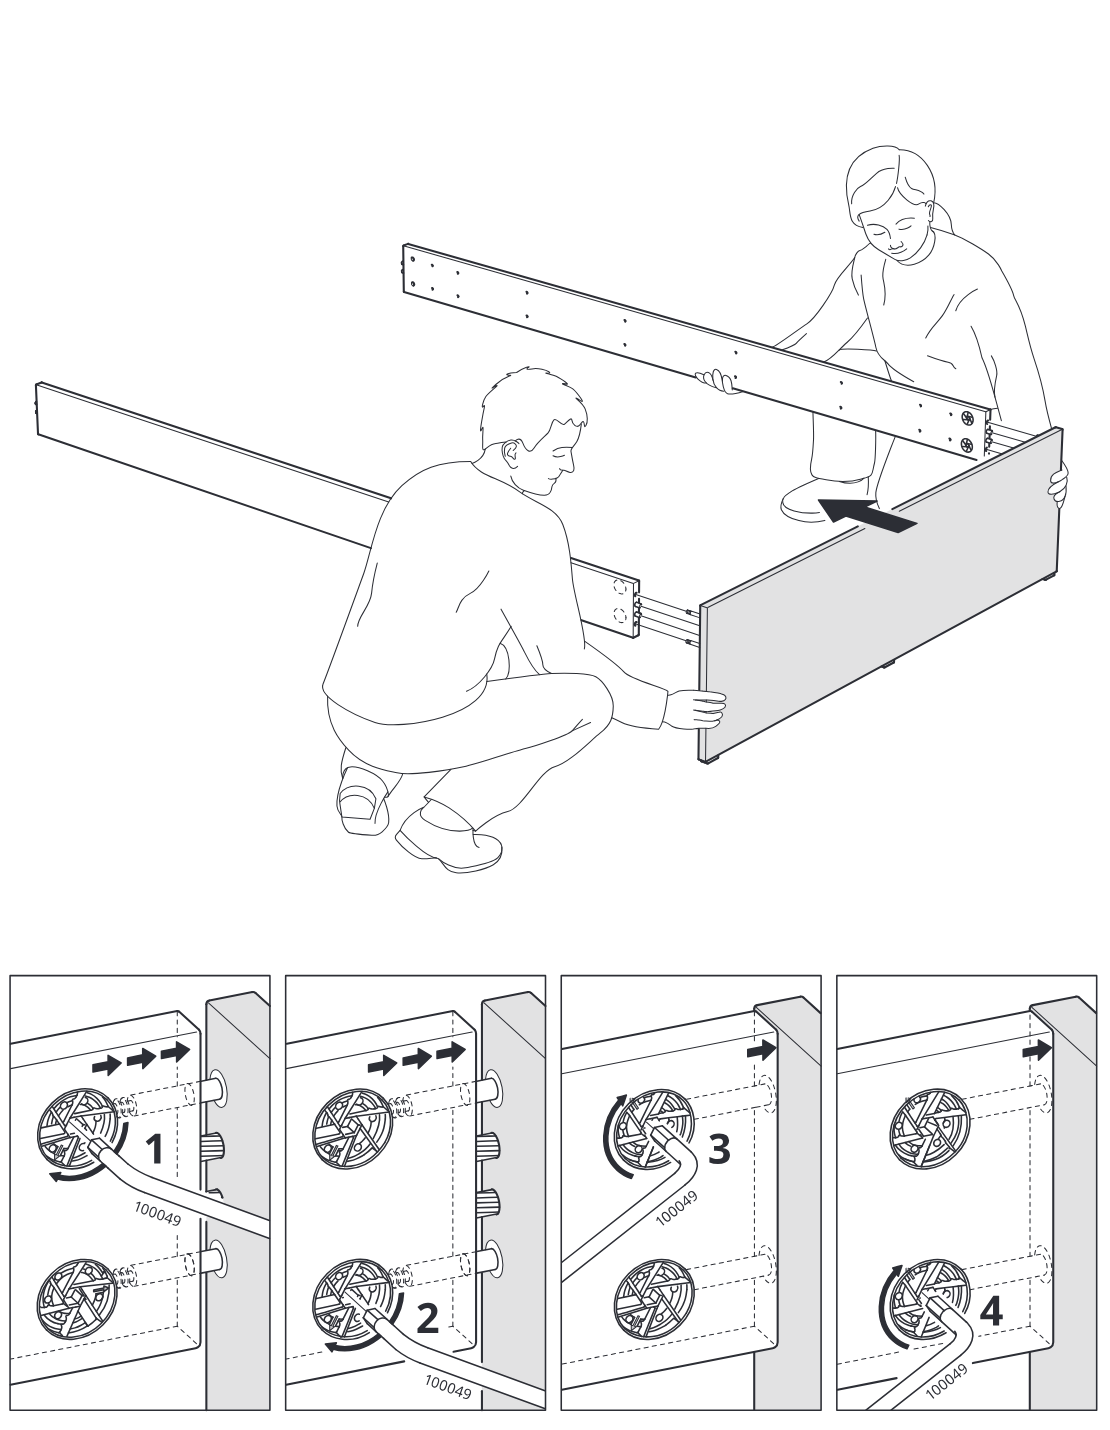
Two people align the long side rails with the end panel and then tighten the four cam locks using tool 100049 in the shown order.
Step 6
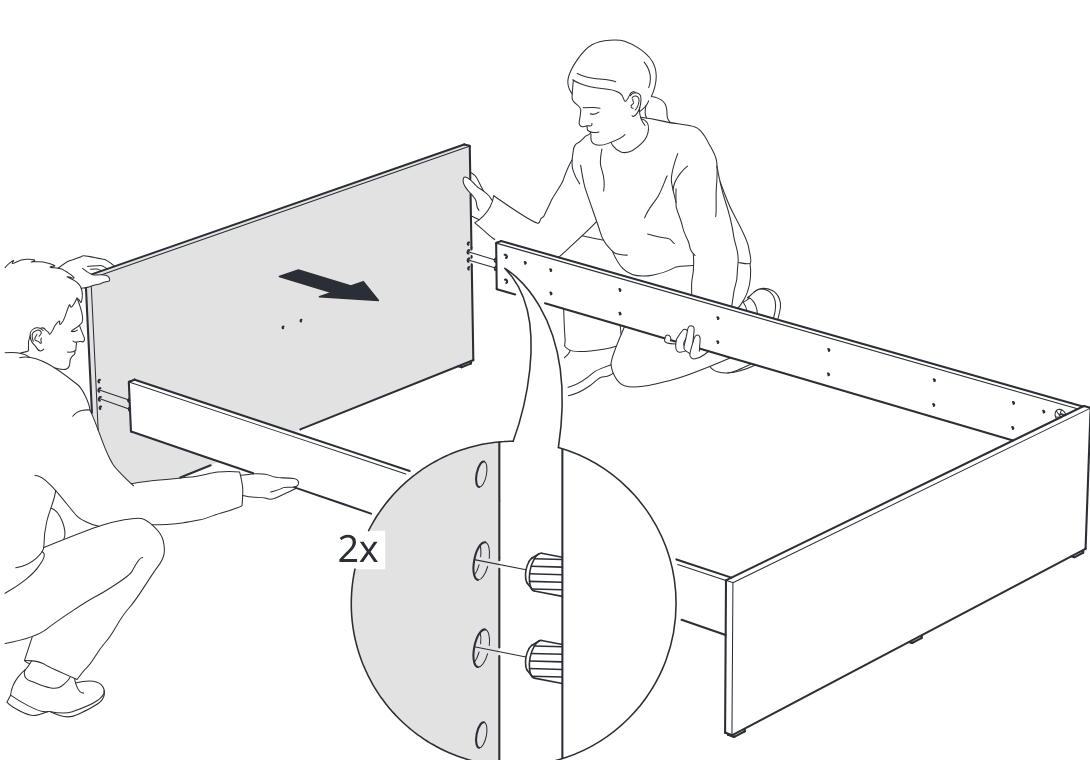
Two people bring the large end panel into place and tighten two cam locks to join it to the bed frame side panels.
Step 7
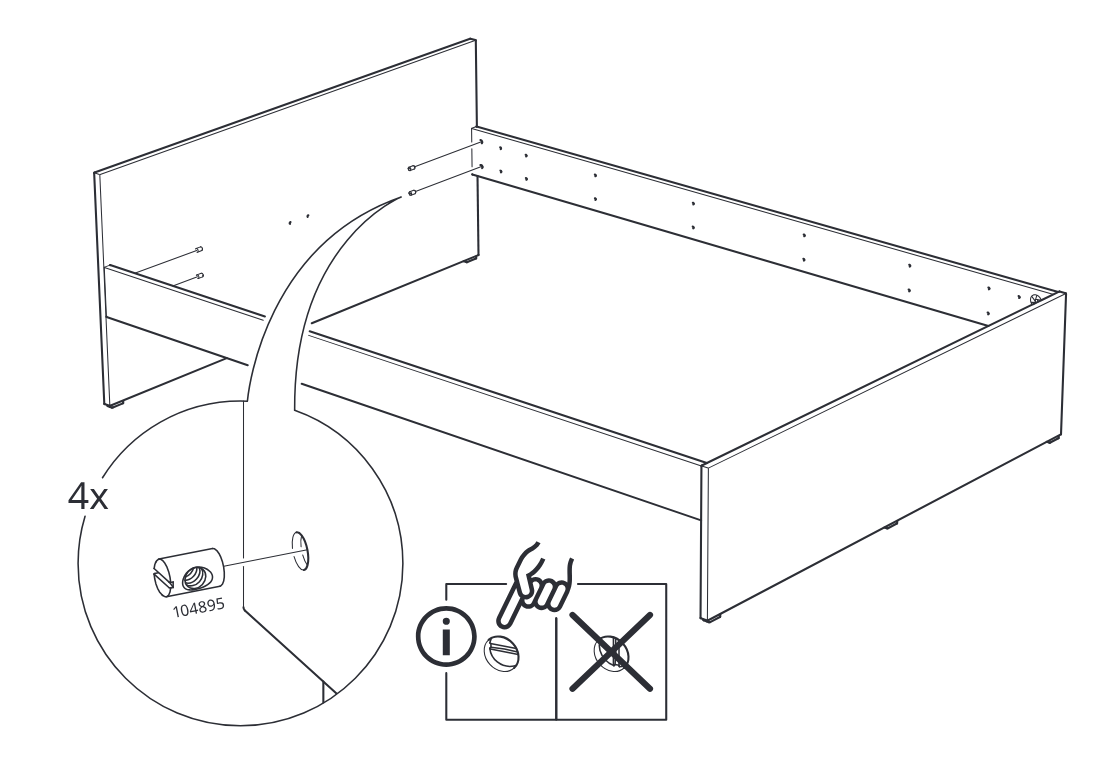
Four threaded barrel nuts are inserted into the end panel holes, with the info box indicating the slot orientation and warning against incorrect alignment.
Step 8
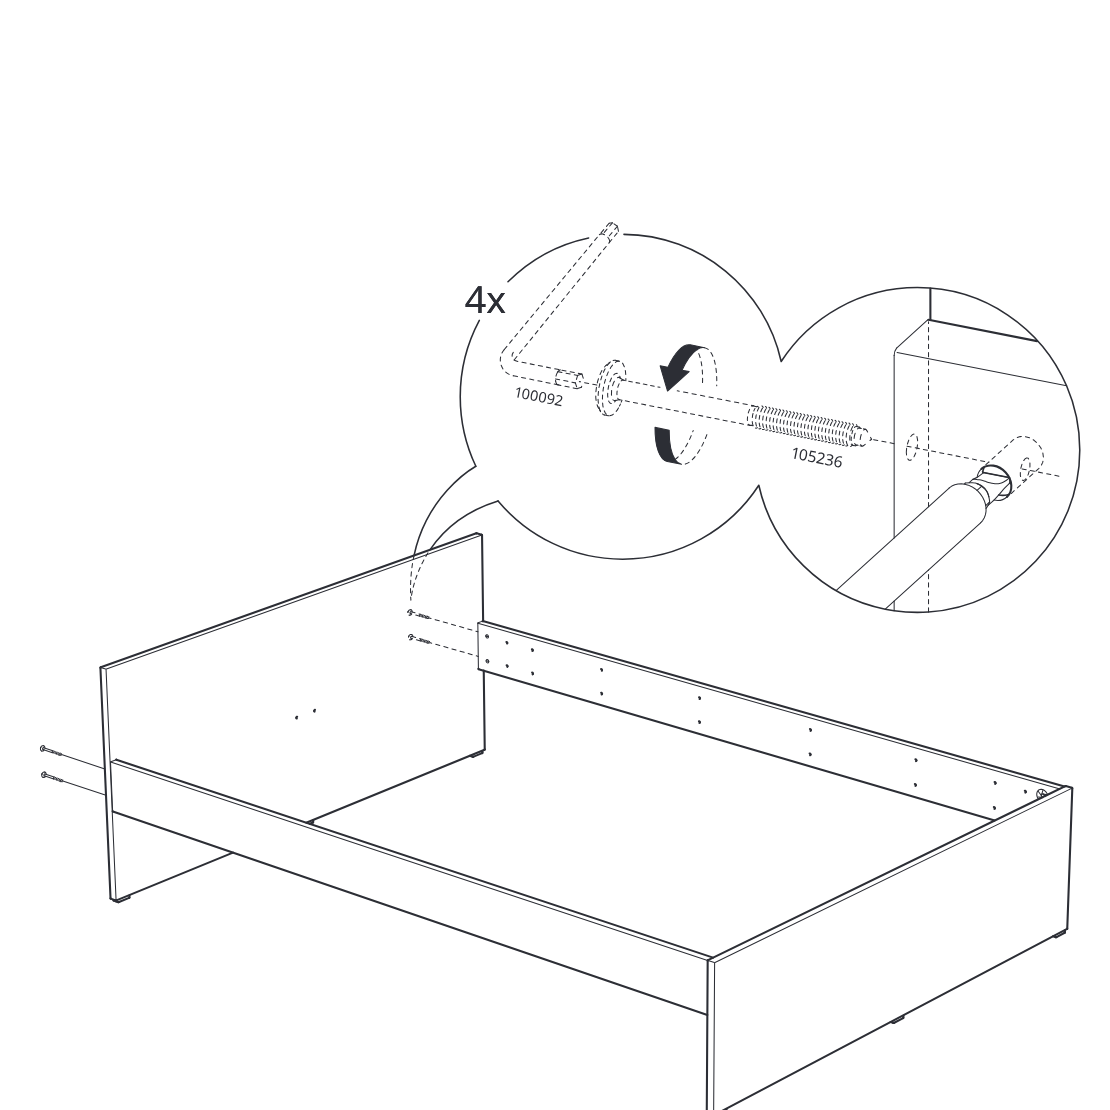
Tighten four long connector bolts into the side panel with the hex key to secure the bed frame, as shown in the zoom callout.
Before you begin
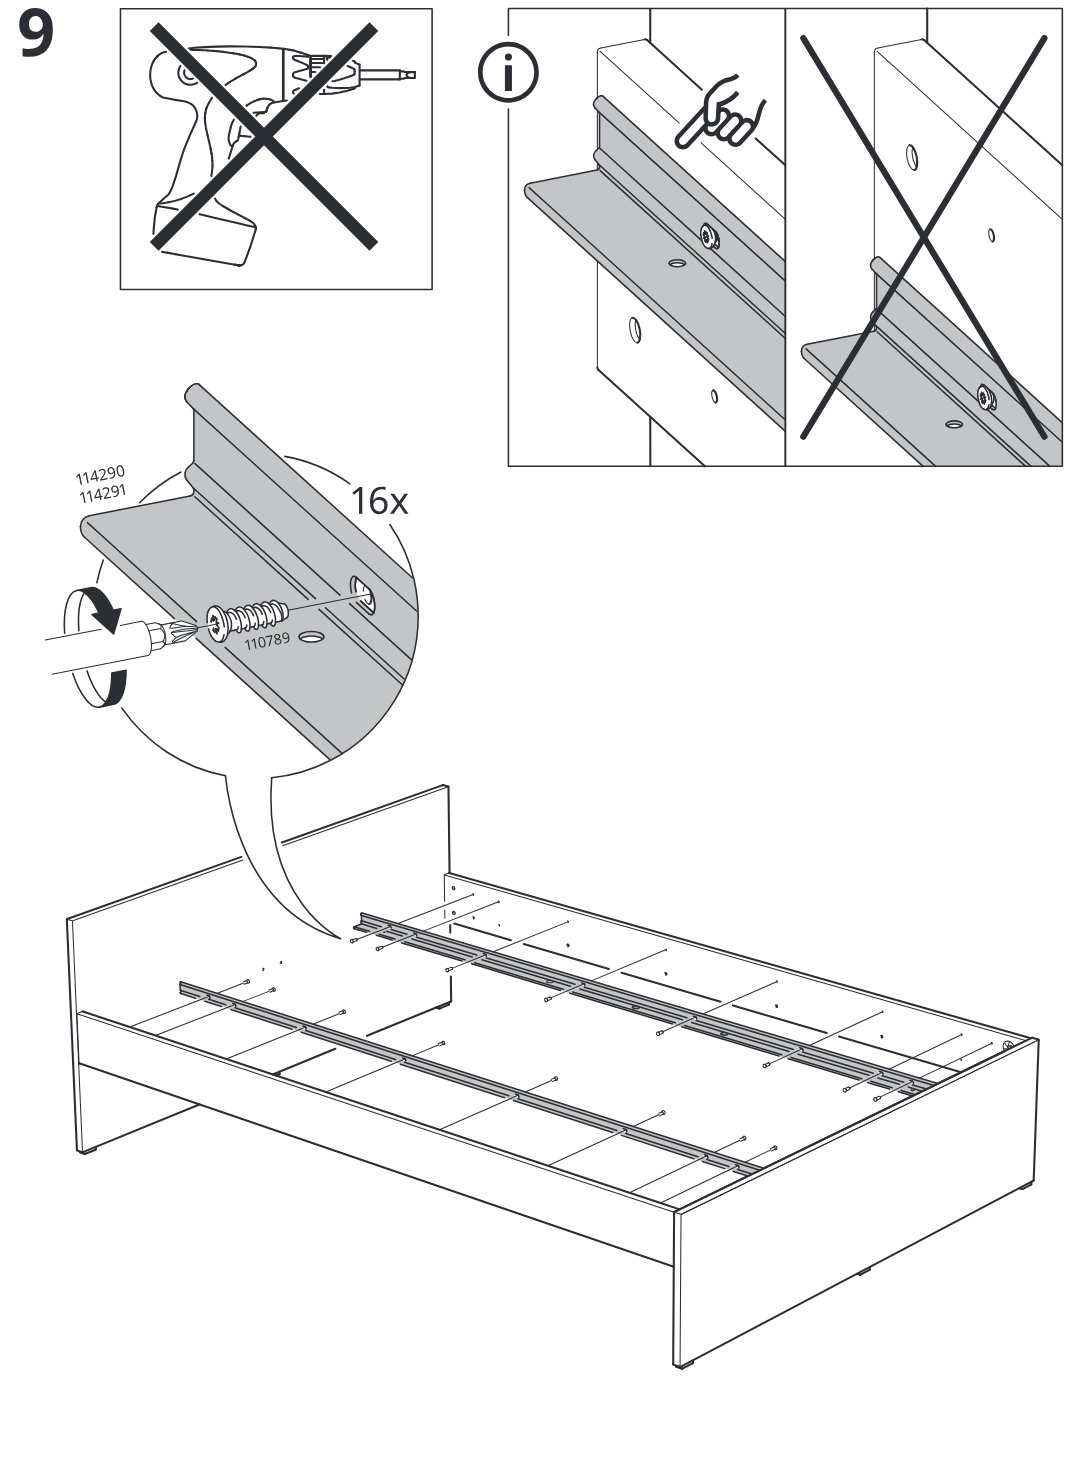
Parts-bag reference page 9 showing not to use a power drill, an information panel on rail orientation/placement with a correct and incorrect example, and the main instruction to drive 16 screws (110789) into rails 114290/114291 on the bed frame.
Step 10
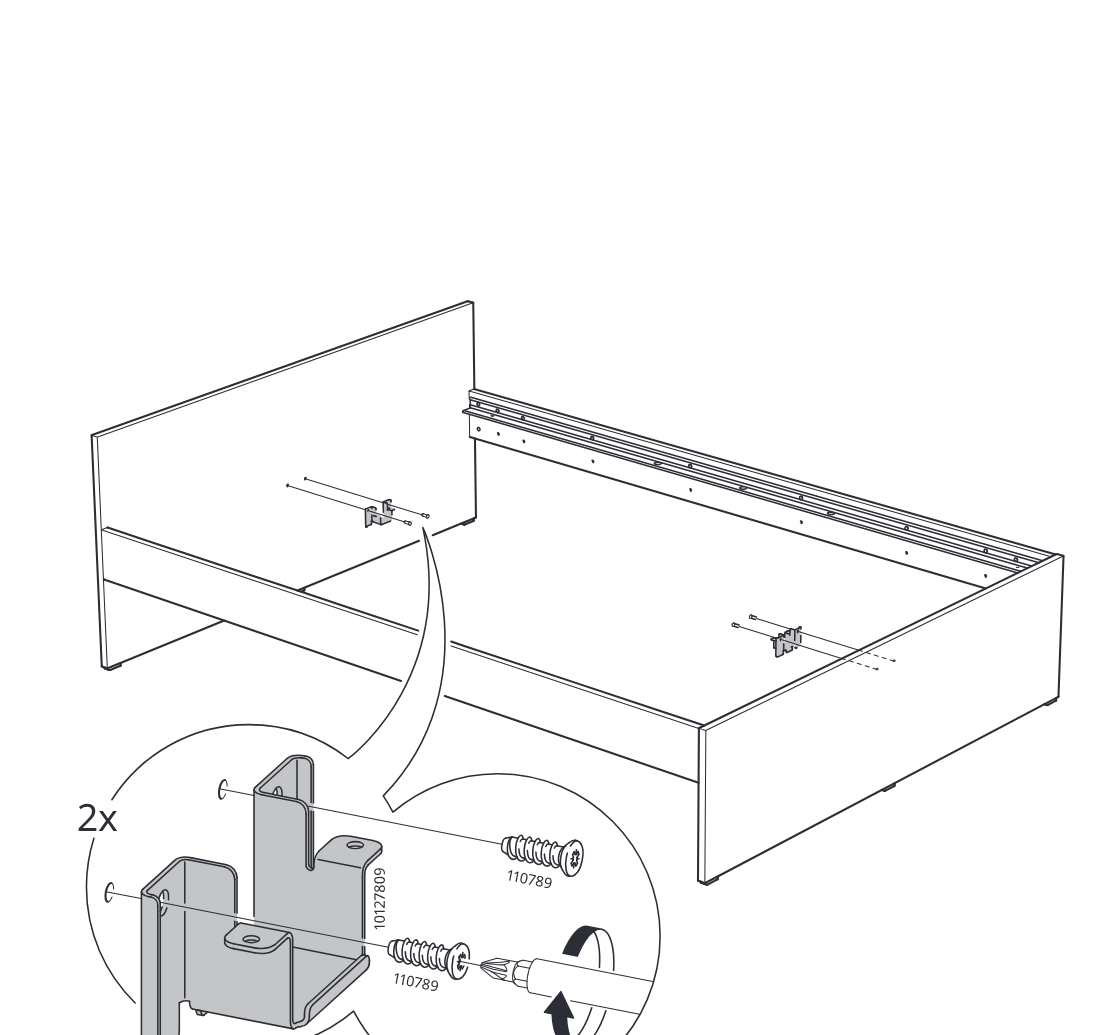
Attach two metal brackets to the inner side panels of the bed frame using two screws each, as shown in the enlarged screwdriver callout.
Step 11
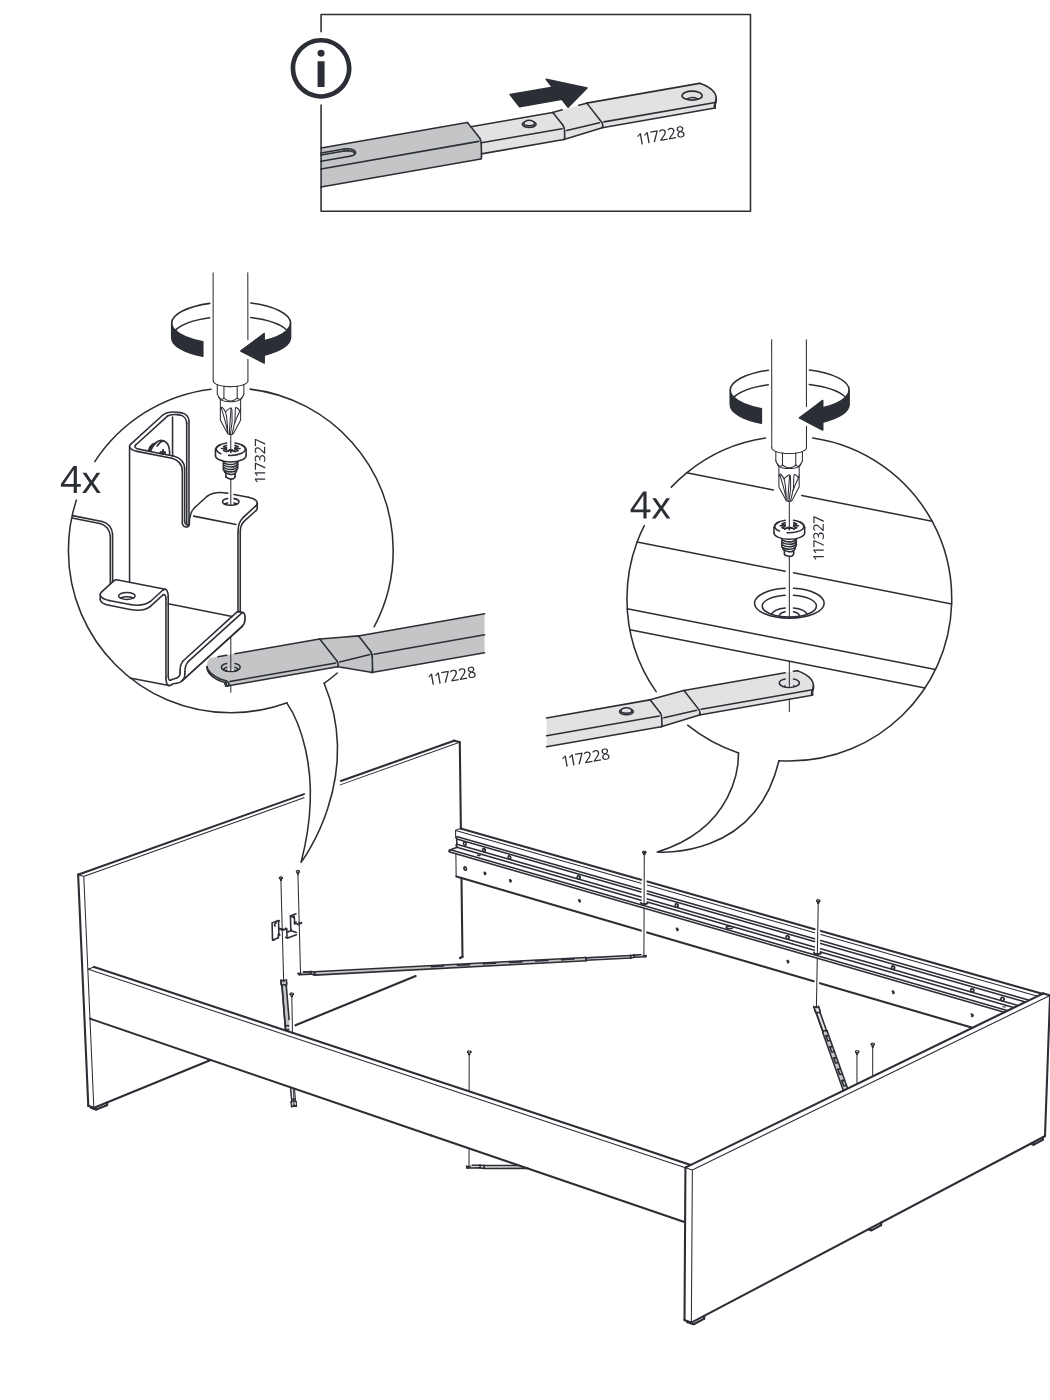
Extend rail part 117228 as shown in the info panel, then fasten it with four 117327 screws on each side inside the bed frame.
Before you begin
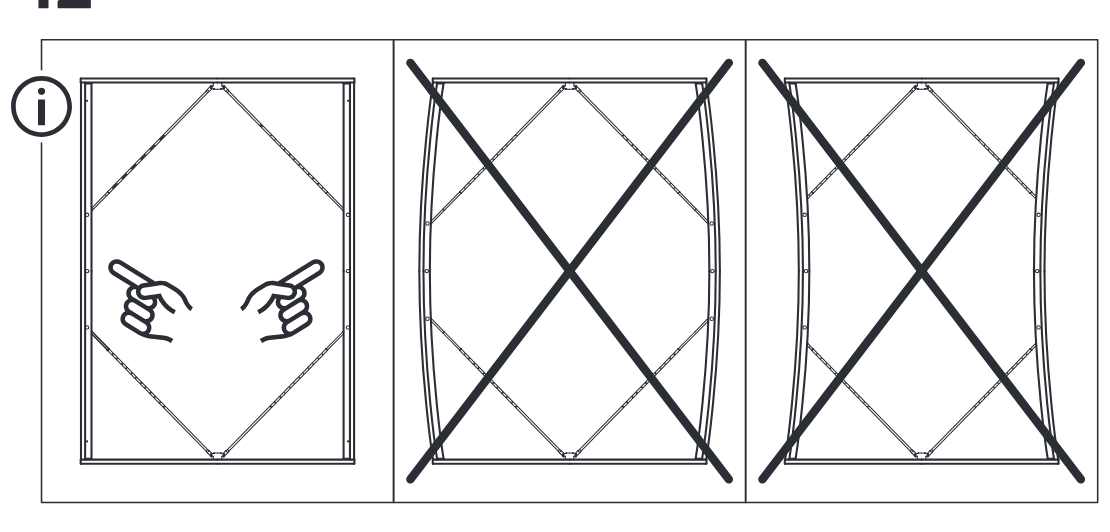
Information panel showing the correct frame squareness check by comparing the back brace pattern, with two crossed-out distorted alternatives.
Step 12
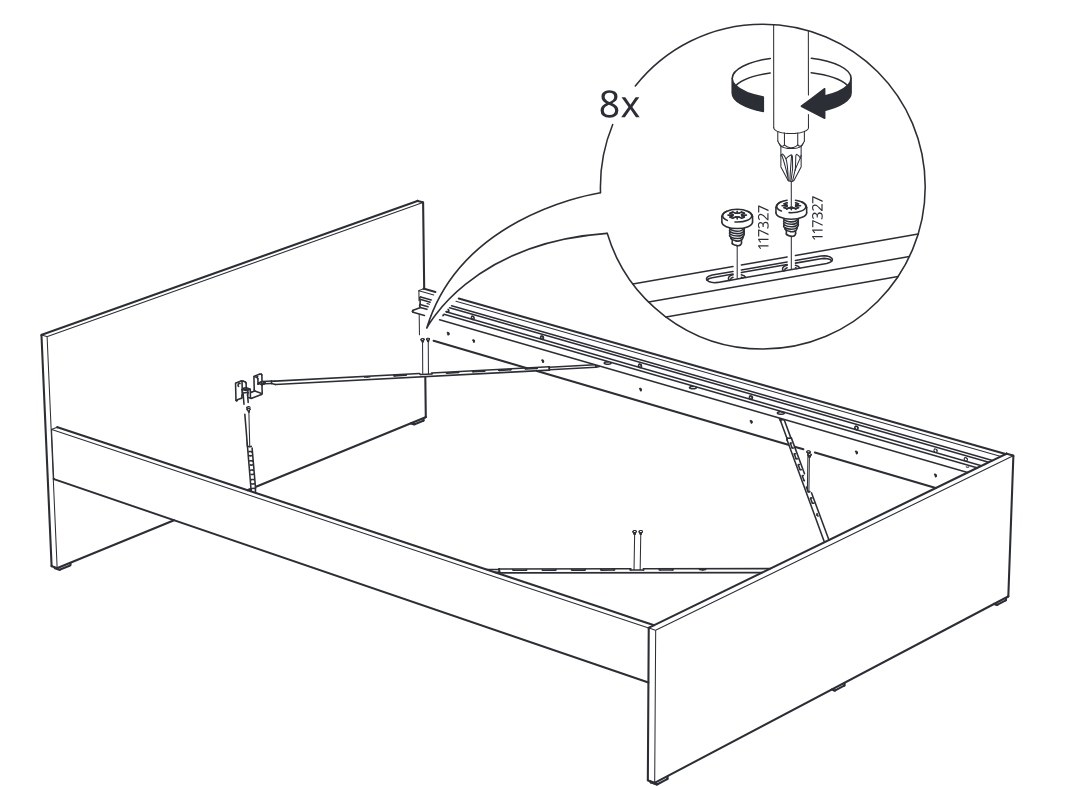
Tighten 8 screws in the bed frame while ensuring the frame remains square, as shown in the zoom callout.
Step 13
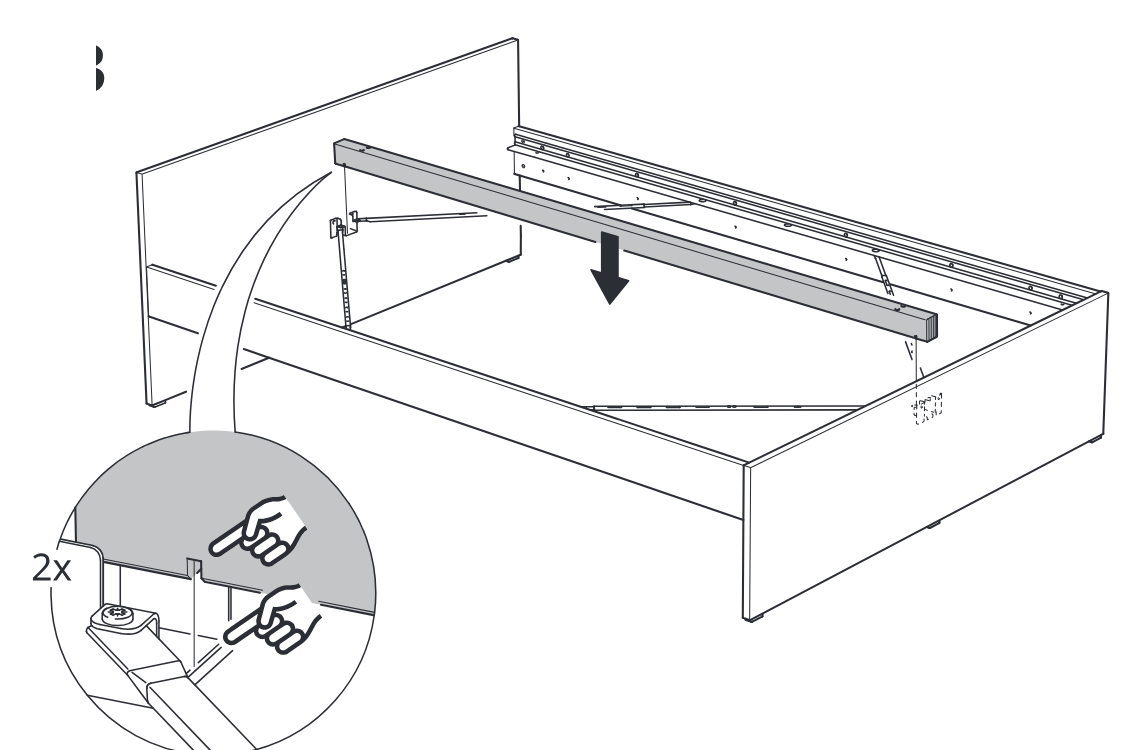
A long center support beam is lowered into the bed frame and the locking tabs at both ends are pressed into place twice.
Step 14
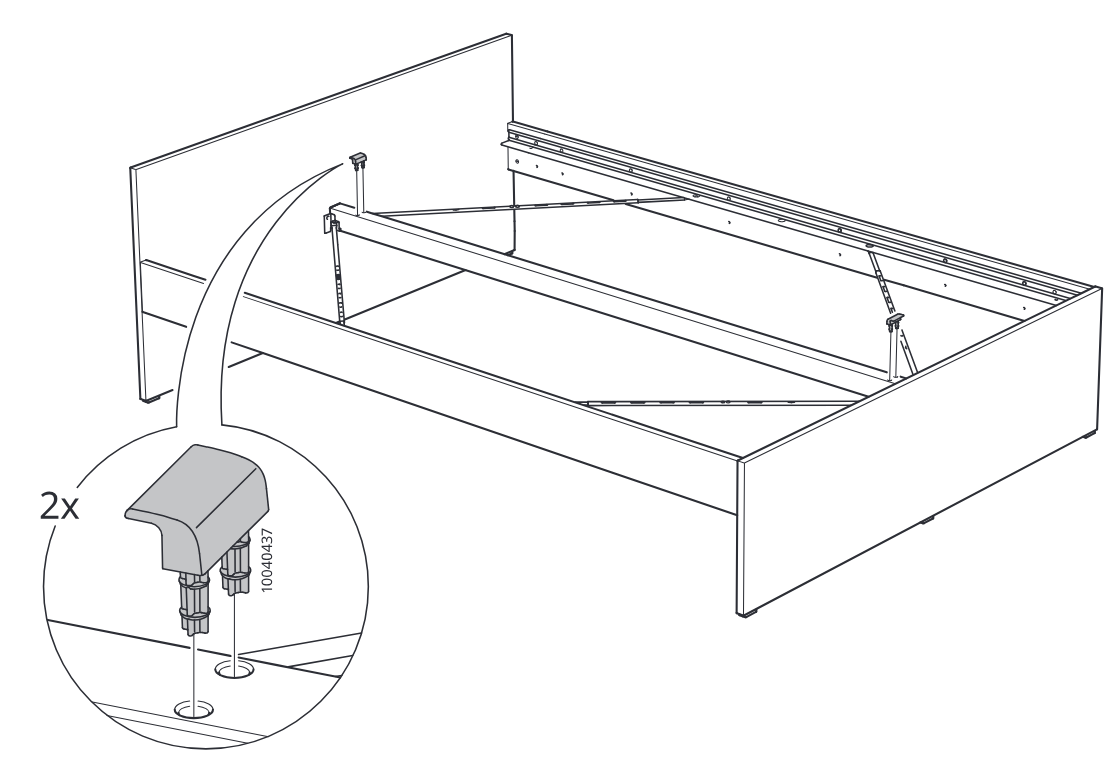
Two plastic caps part 10040437 are inserted into the holes at the ends of the installed support beam.
Step 15
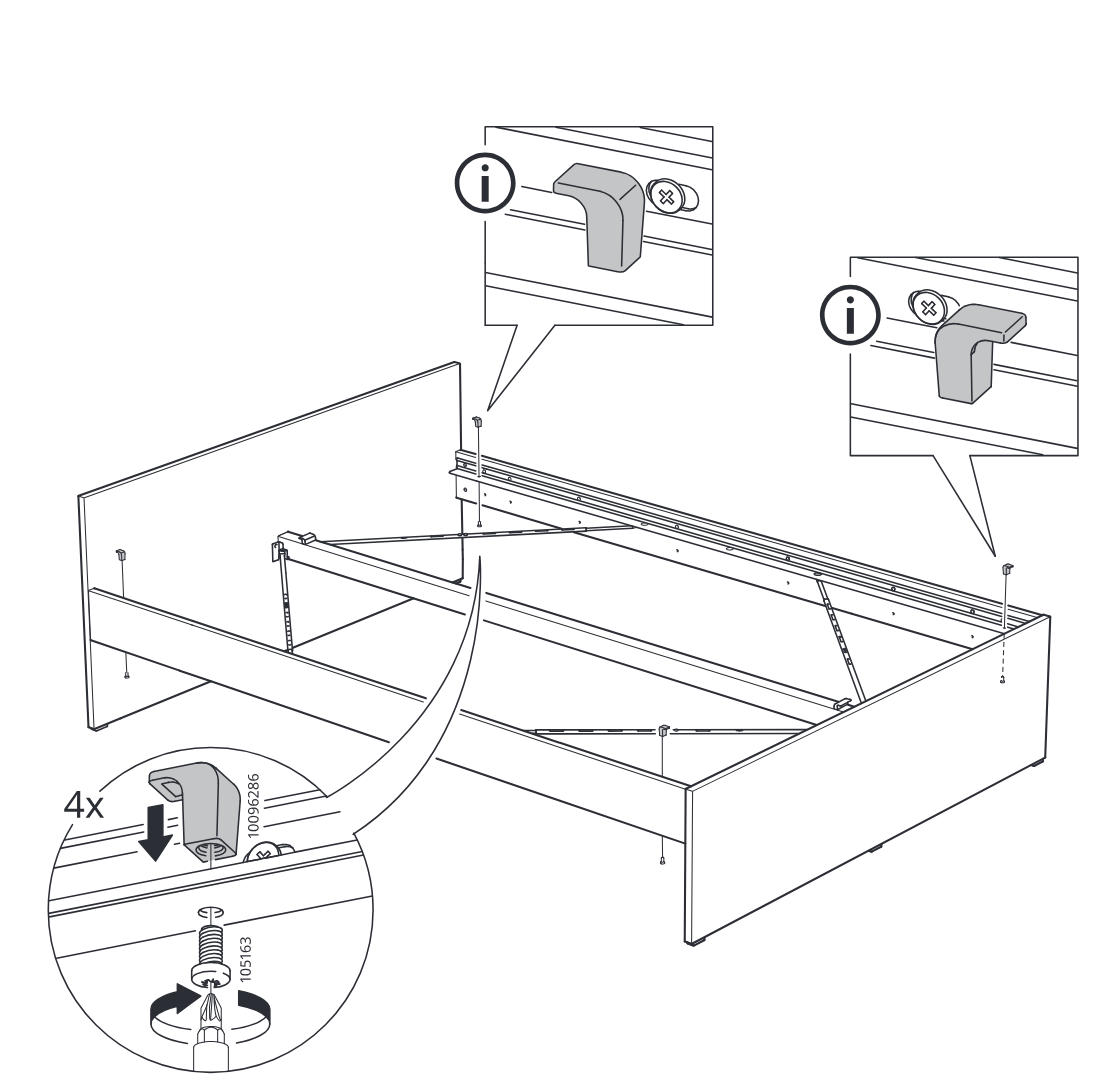
Attach four gray clip brackets onto the bed frame rails and tighten the screws from below, with zoom callouts showing the two possible bracket orientations on the rail.
Step 16
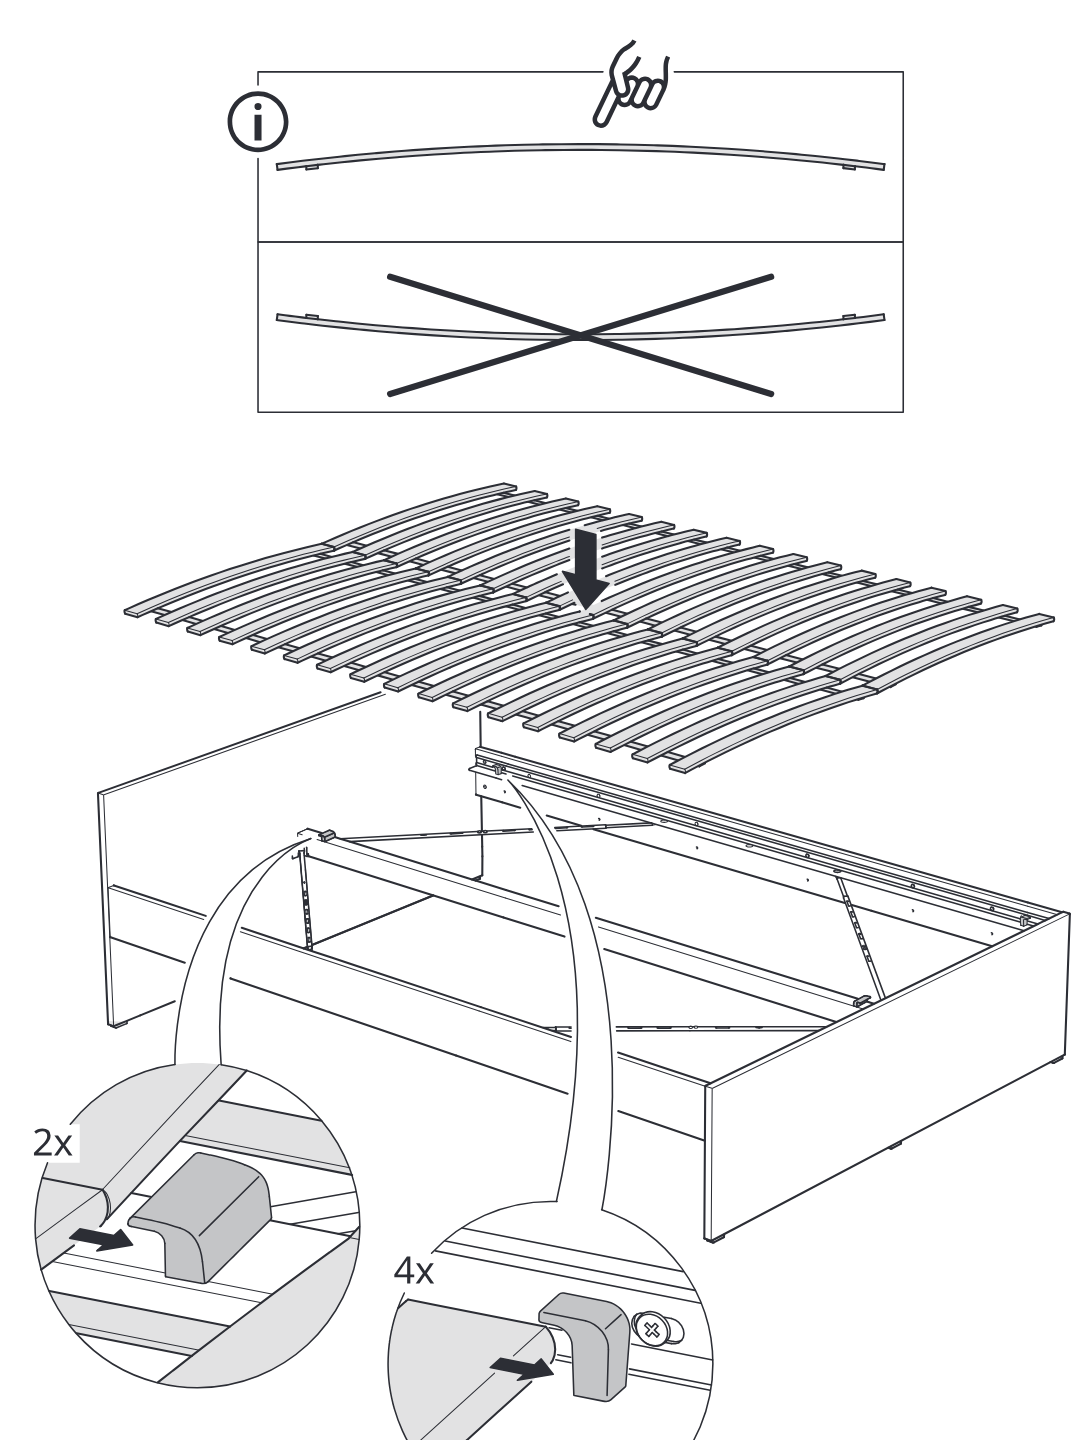
Place the curved slatted base into the bed frame with the slats arched upward, then slide the two end retainers and four side clips into position to secure it.